Looking for something else?
Try one of these!
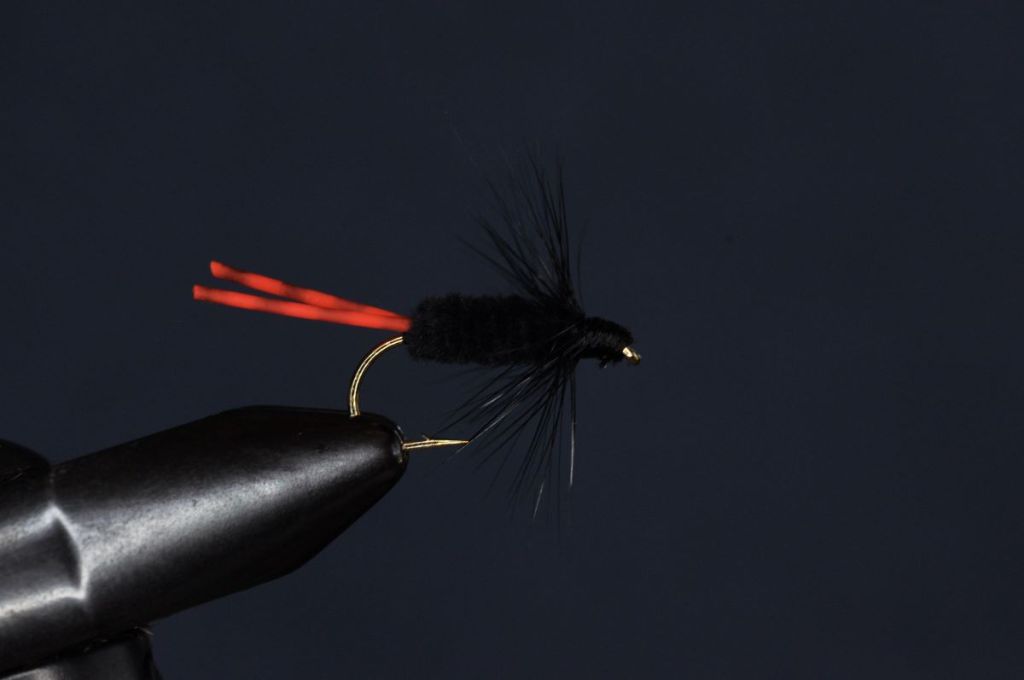
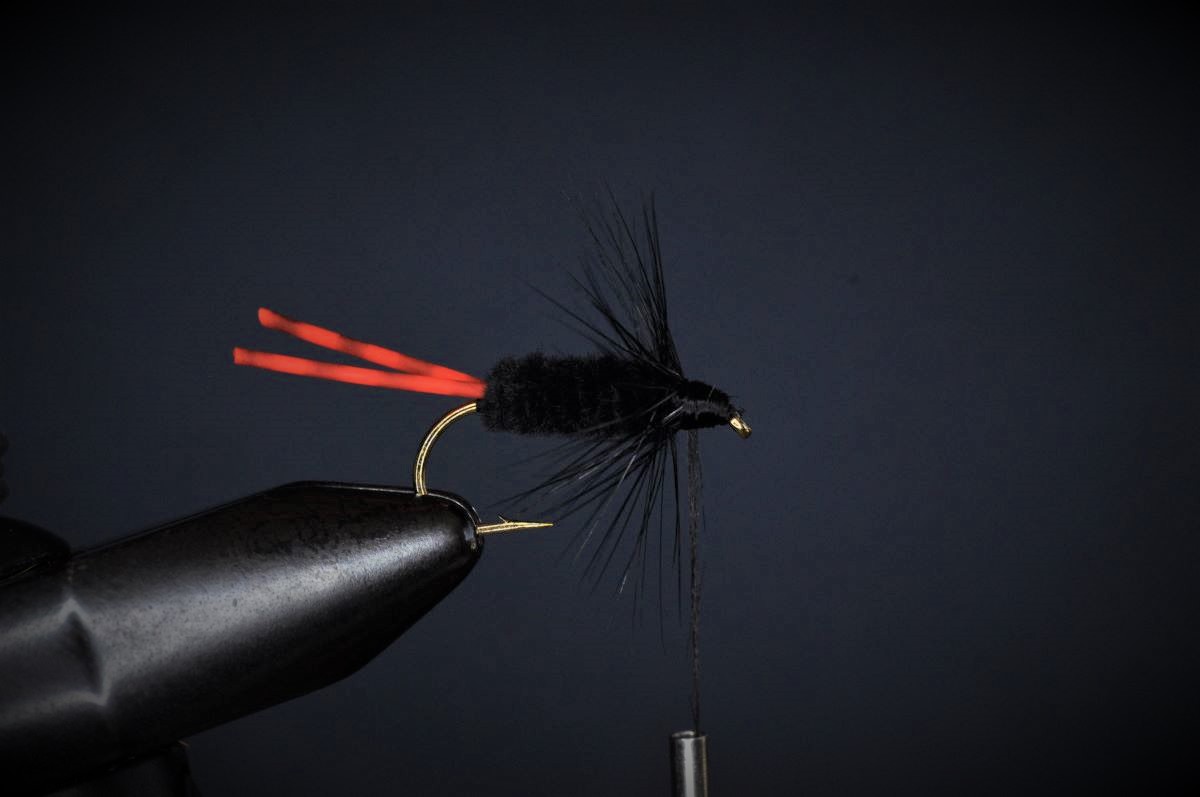
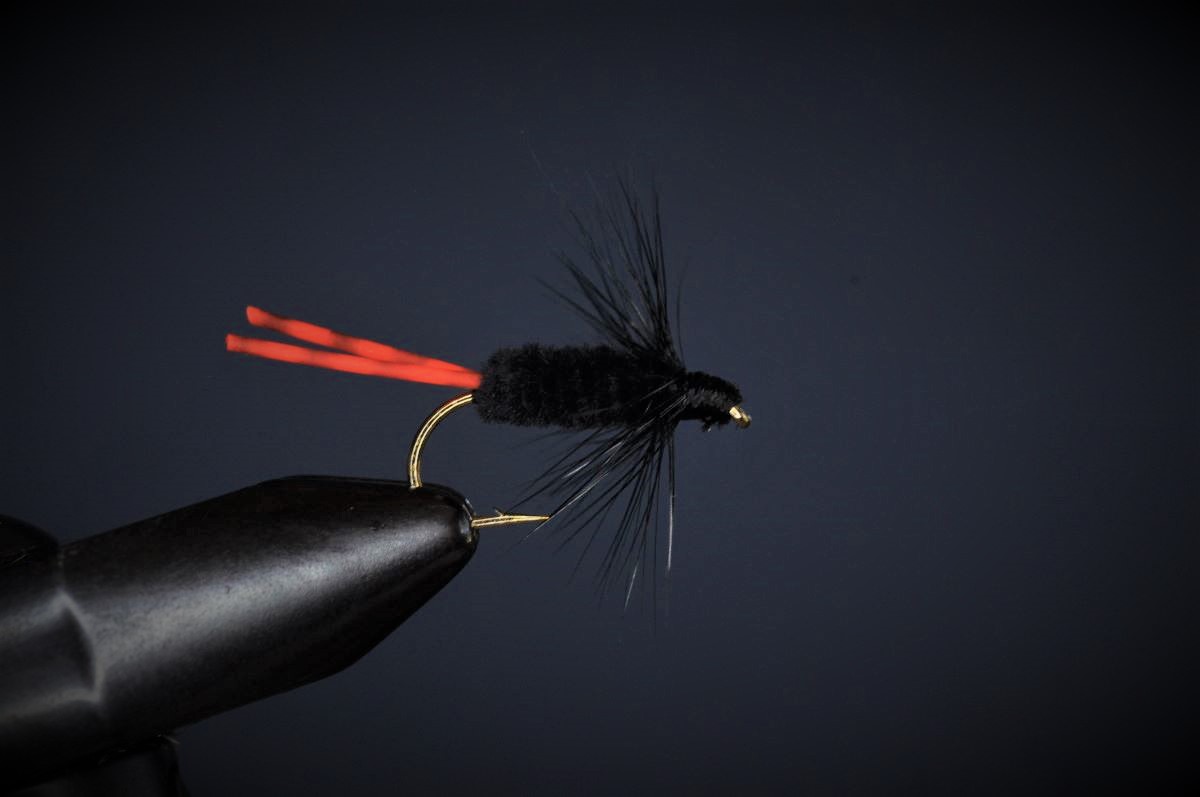
Bluegill Killer Fly Step-by-Step:
Today’s fly is one I admittedly know little about. An attractor-style wet that doesn’t look like anything in particular, the Bluegill Killer was first recommended to me in November of 2020. Having recently lost my warmwater box, I reached out to the online tying community for recommendations.
Among the numerous responses, was an image of today’s pattern with the following comment:
“This one saved the day on my last trip. It wasn’t a stellar day, but my luck changed when I tied it on. The bluegill killer. Takes about a minute to tie…”
While I made note of the fly at the time, it never made it to the top of my tying list and eventually slipped my mind. That is, until one arrived from the same tyer as part of a recent Fly Swap.
Though I could not remember the name of the fly at first, I recognized it from the past recommendation and slotted it in my warmwater box as I prepared for an afternoon visit to New Orleans’ City Park Lagoon.
As was the case for the gentleman who originally recommended it, it changed my luck as well.
| Materials: | ||
|---|---|---|
 1x- 2x Nymph Hook (size 10) 1x- 2x Nymph Hook (size 10) |  70 Denier (Black) 70 Denier (Black) |  Round Legs (Barred; Orange or Red) Round Legs (Barred; Orange or Red) |
 Chenille (Medium; Black) Chenille (Medium; Black) |  Hen Hackle (Black or Grizzly) Hen Hackle (Black or Grizzly) |  Brass or Tungsten (Sized to match; optional) Brass or Tungsten (Sized to match; optional) |
Disclosure: This post contains affiliate links. A small commission may be paid for purchases made through these links.
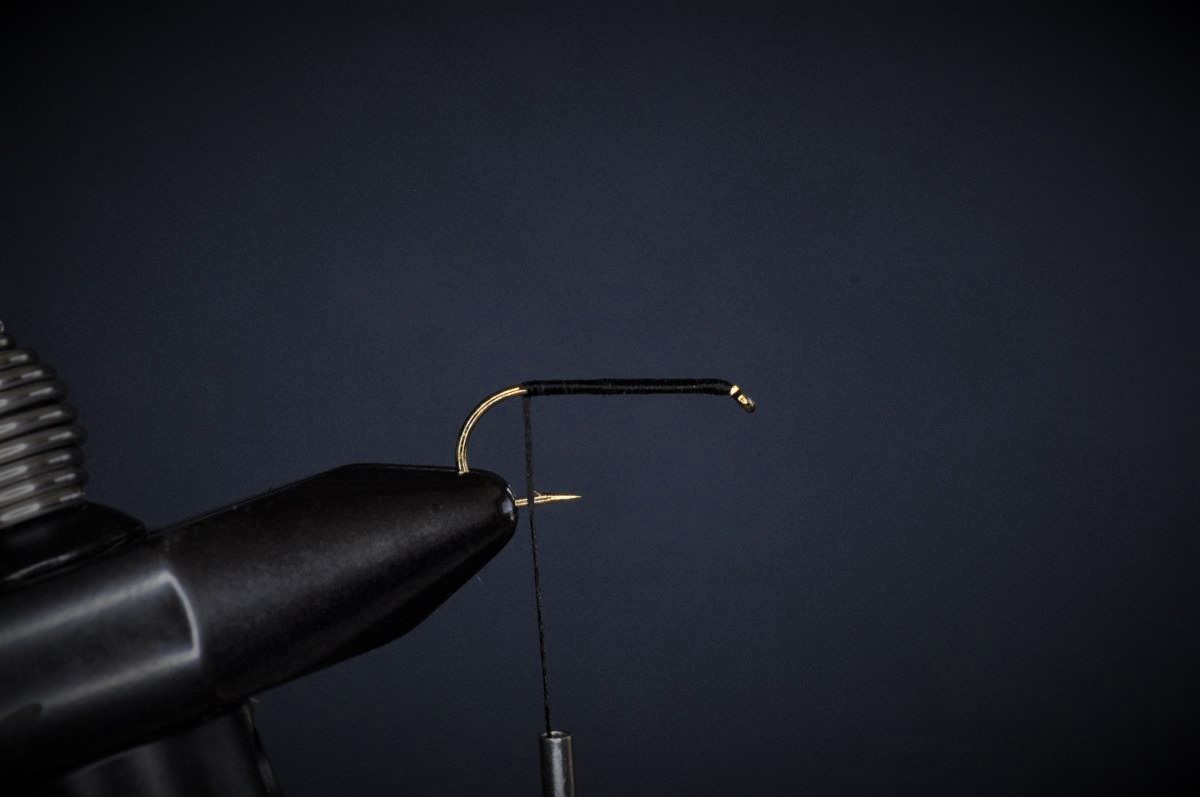
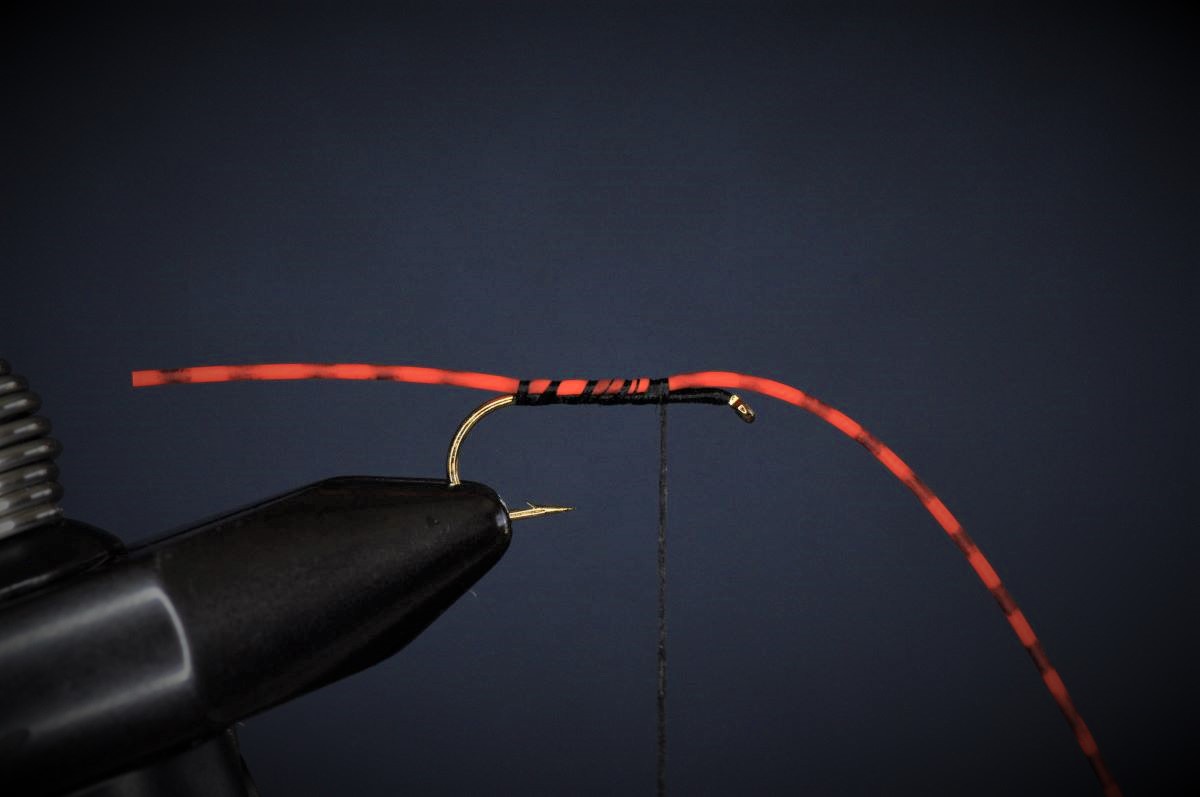
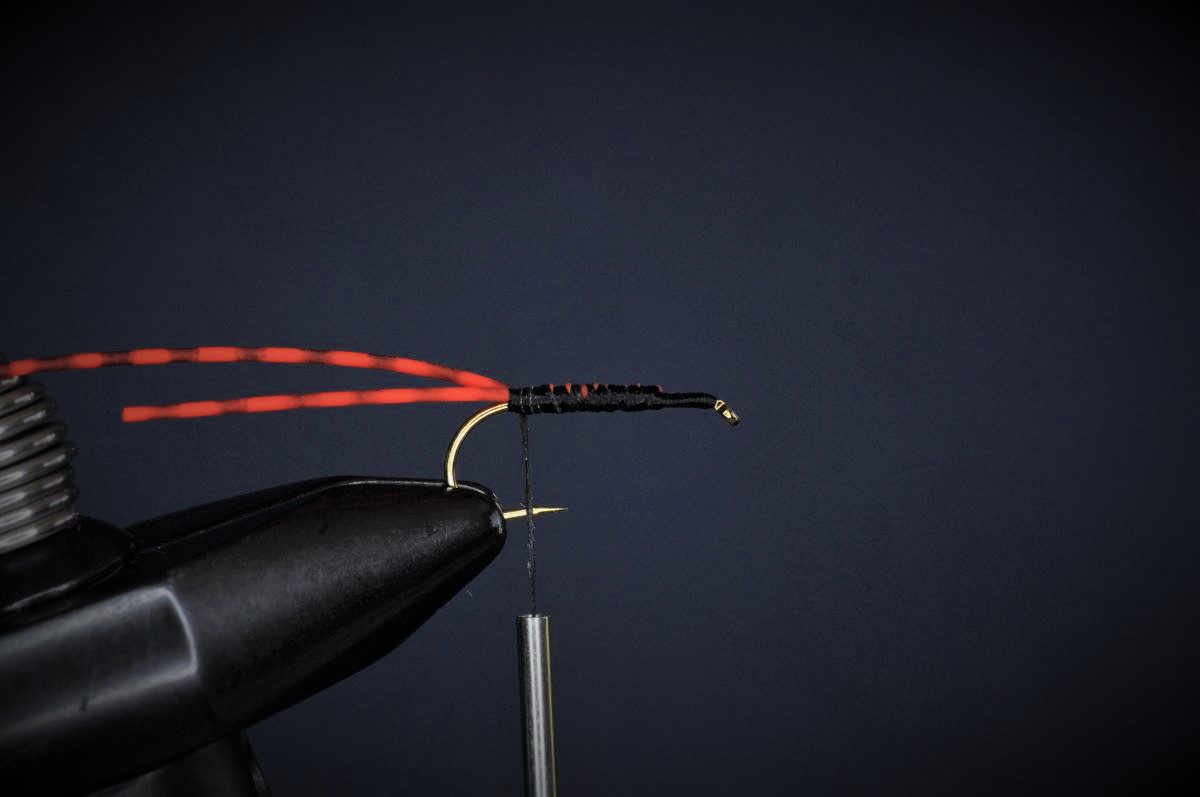
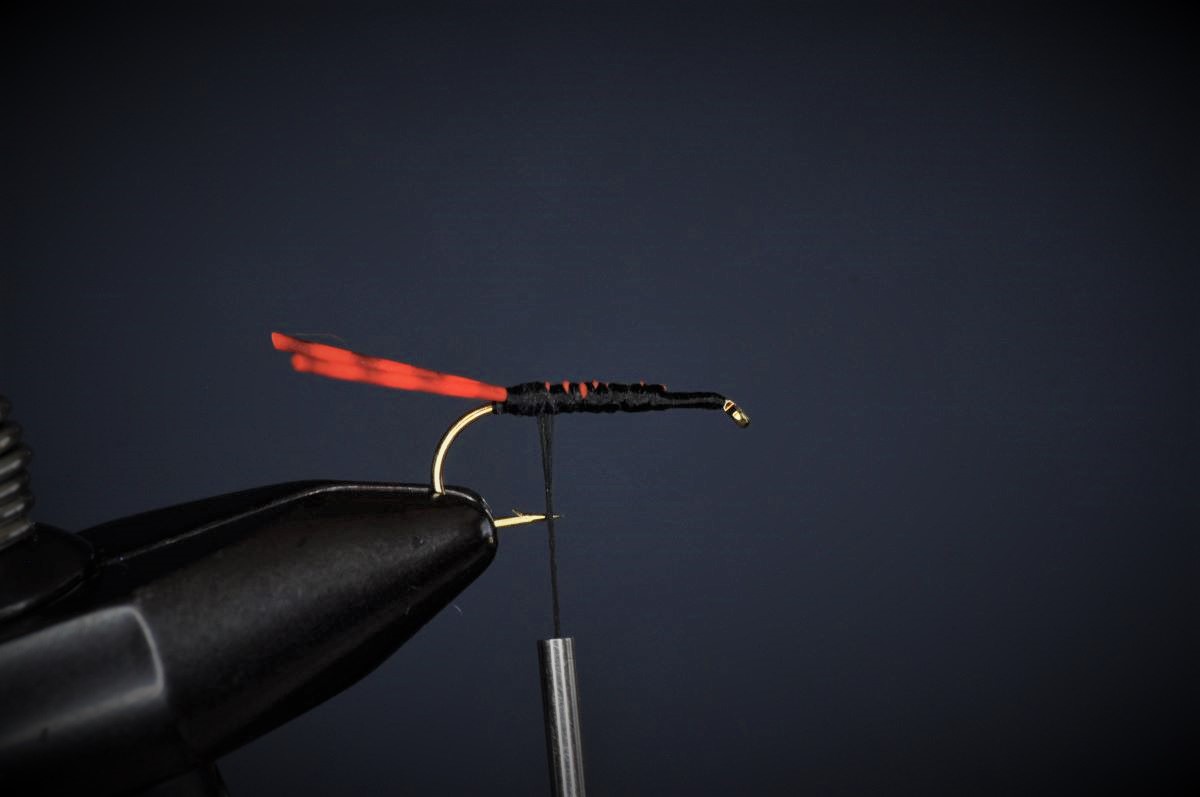
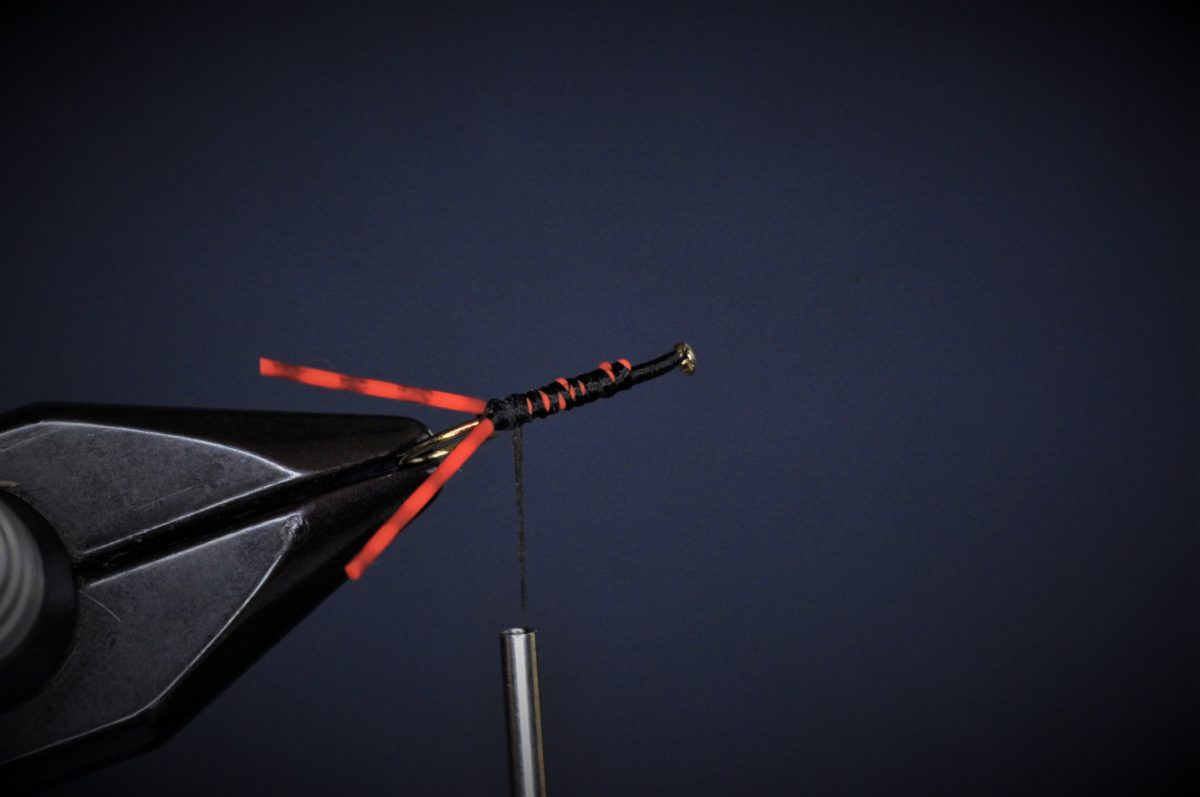
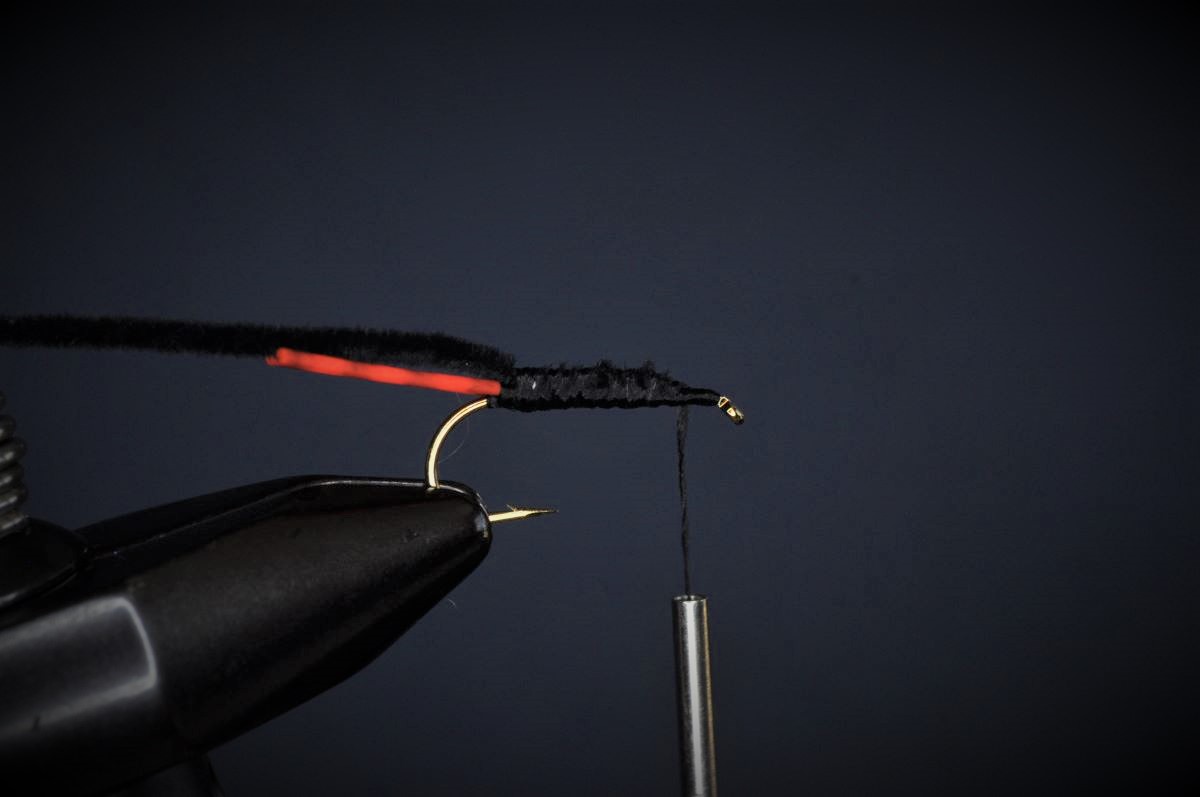
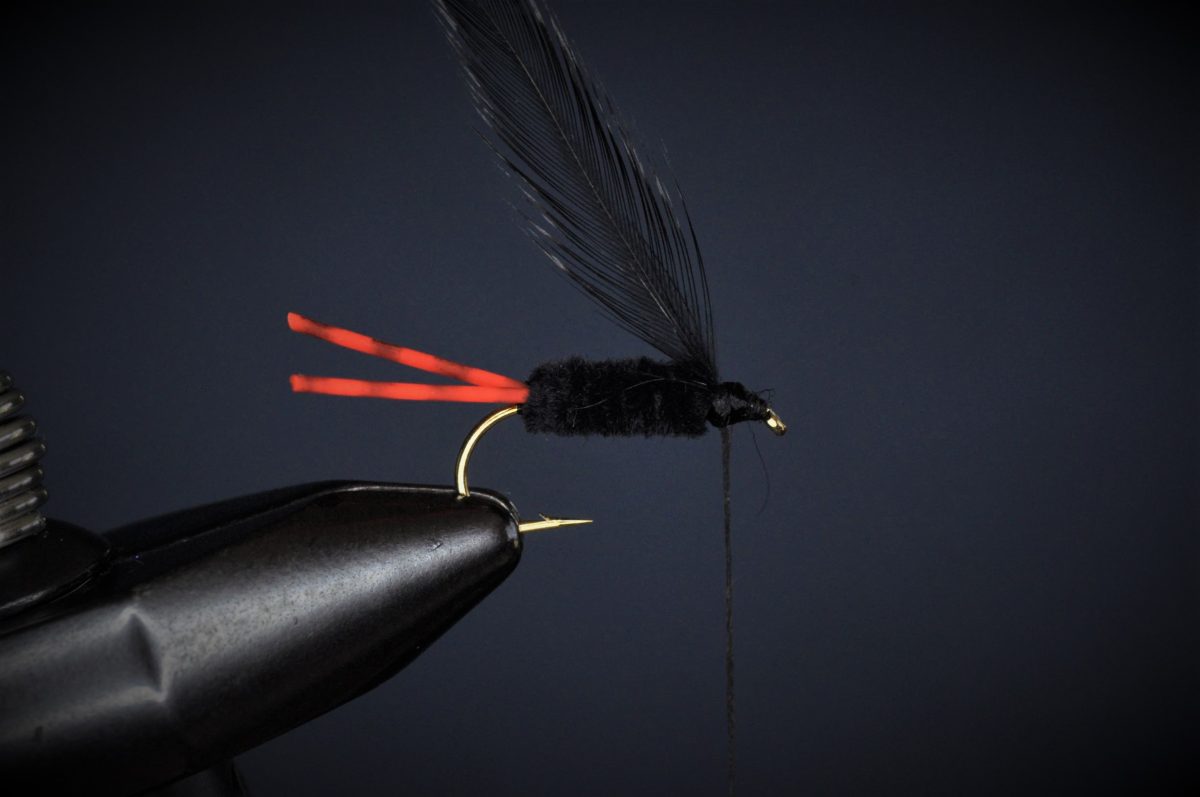
Bluegill Killer Fly Step-by-Step Tying Instructions:
(Mobile Viewers: Click images to enlarge)
Tips and Tricks
- Thread Matters – Not specific to this pattern, but something worth noting. Keep your thread selection in mind when tying smaller patterns. In this case, a shortage of black 70 Denier Ultrathread lead me to select an unmarked spool of what I thought was similarly gauged Uni-thread from the rack. It became obvious that it was not after I began tying, but I stuck with it. For the most part this was a non-issue. That is until I attempted to build a head on the fly as I finished. The thread, bulkier than I had wanted, resulted in a poorly formed head with thread slipping forward as I prepared to whip finish. While the fly will still catch fish, I risked crowding the eye. As this would have made tying the fly to my tippet difficult, if not impossible, I would have been better served finding an appropriately gauged thread or even downsizing to a spool of 12/0. Simply put thread matters. If you’re ever unsure of how two brands or gauges of thread compare, take a look at this table. It could save you a major headache.
- Weight Optional – As noted in the materials list, this pattern can also be tied with a bead head. While the pattern as tied is ideal for the situation described in the proof of concept, consider adding a brass or tungsten bead should you want to prospect a bit deeper.
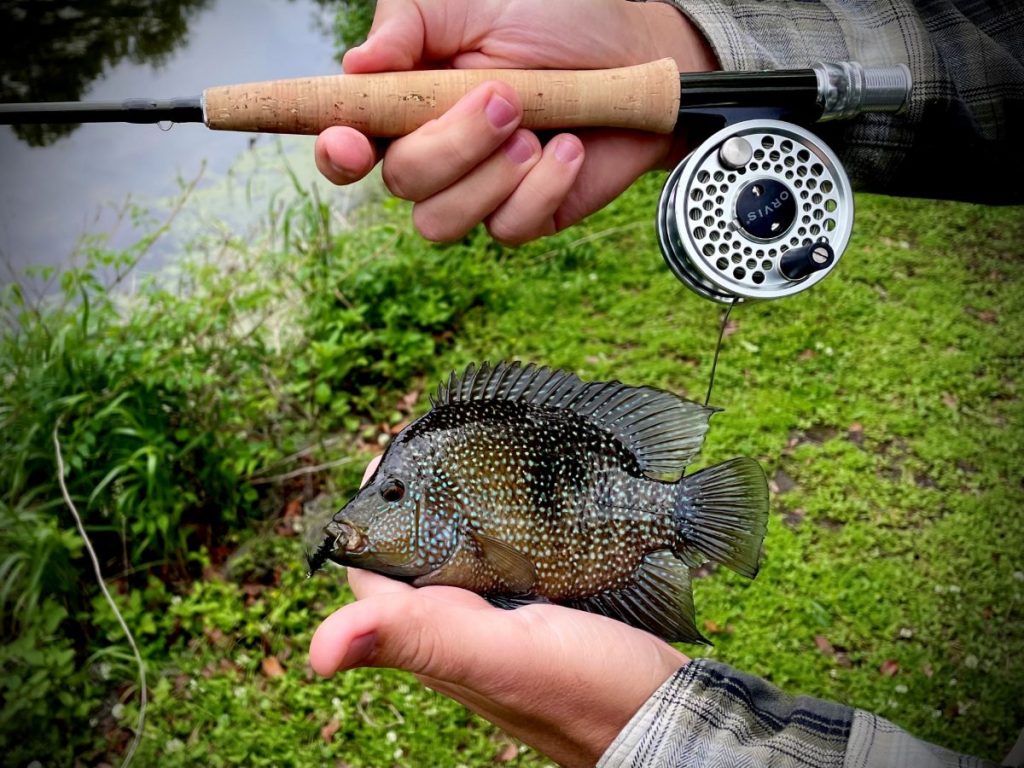
Proof of Concept
This fly first found its way onto my tippet a few weeks back as I prospected New Orleans’ City Park Lagoon for invasive Rio Grande Cichlids. While I had hoped to prove out last week’s SBS (the Rio Getter) on that visit, the conditions simply didn’t allow.
Instead, I found myself tying on the unweighted Bluegill Killer received as part of a recent fly swap. Flipping the fly out towards the middle of the lagoon, I retrieved the fly in a series of slow erratic strips. Careful to keep the fly just above the weed line. Sure enough, the fly disappeared and my 2wt doubled as a small Rio rose from among the vegetation and inhaled my fly.
Tight Lines!
-Chris
Species Caught on the Bluegill Killer Fly to Date:
- Rio Grande Cichlid
- Bluegill
- Largemouth Bass