Looking for something else?
Try one of these!
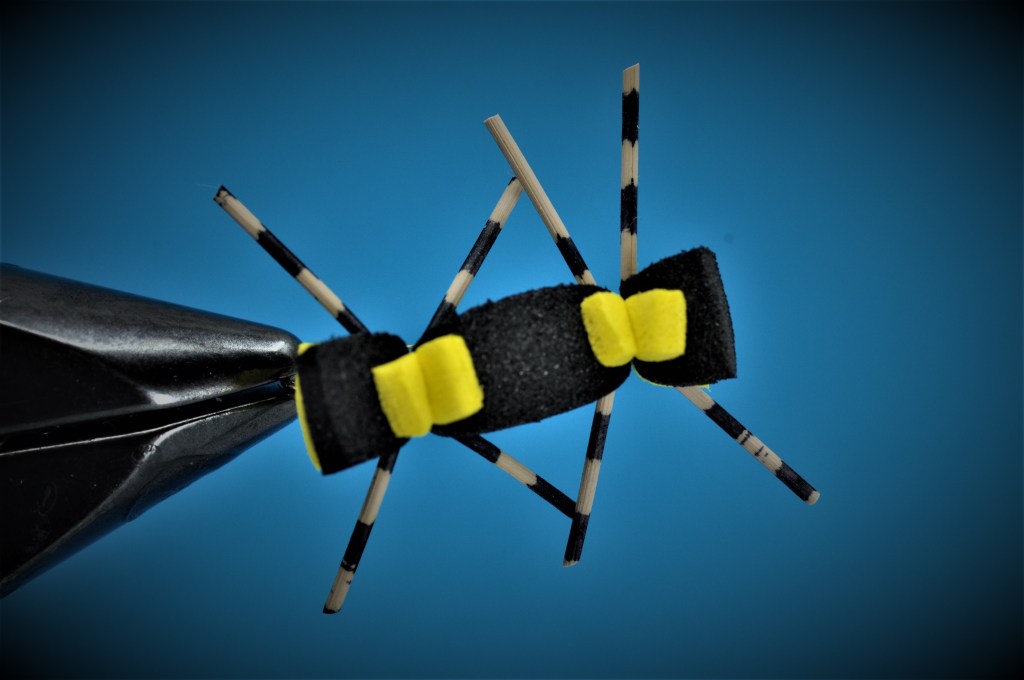
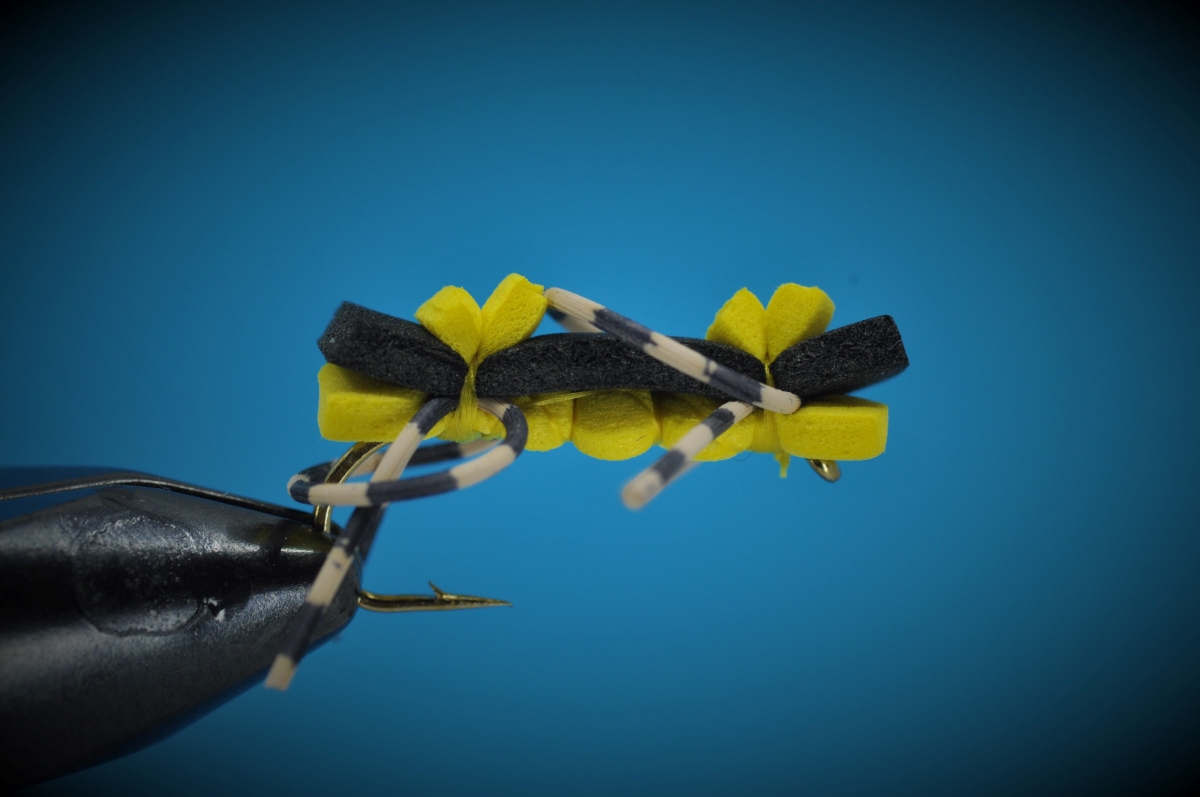
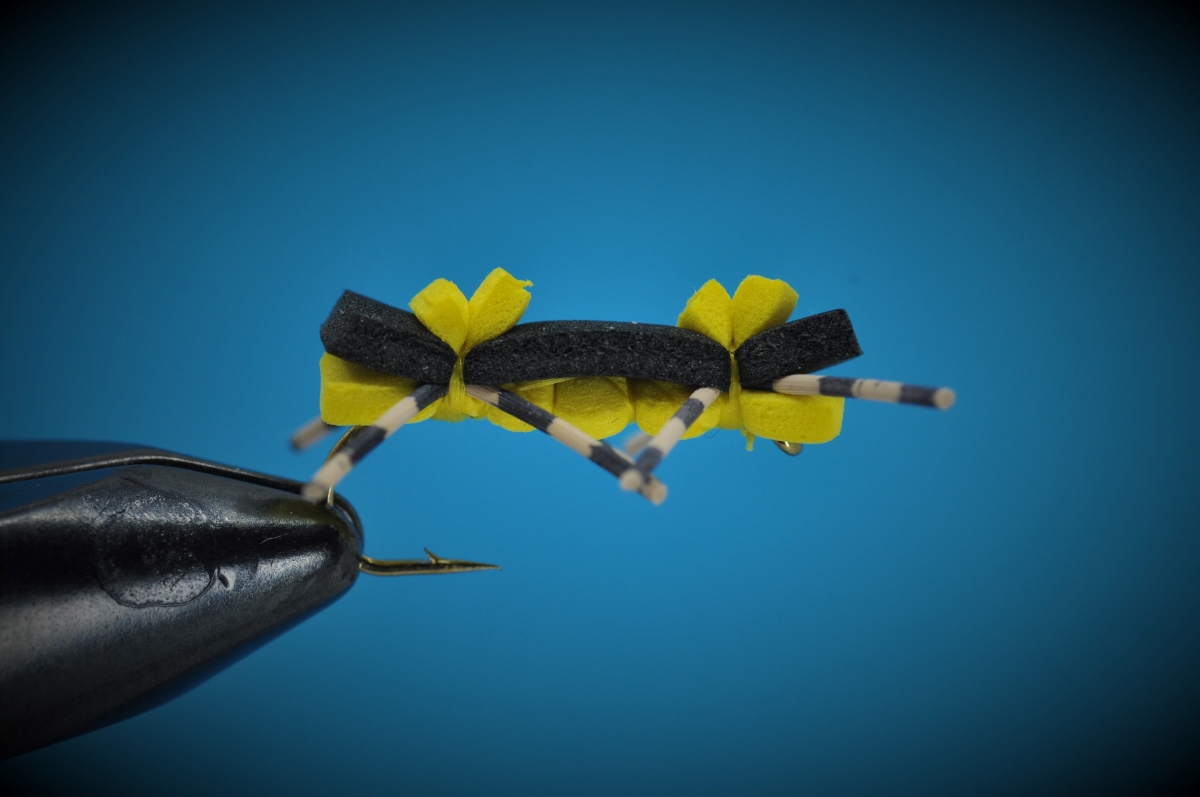
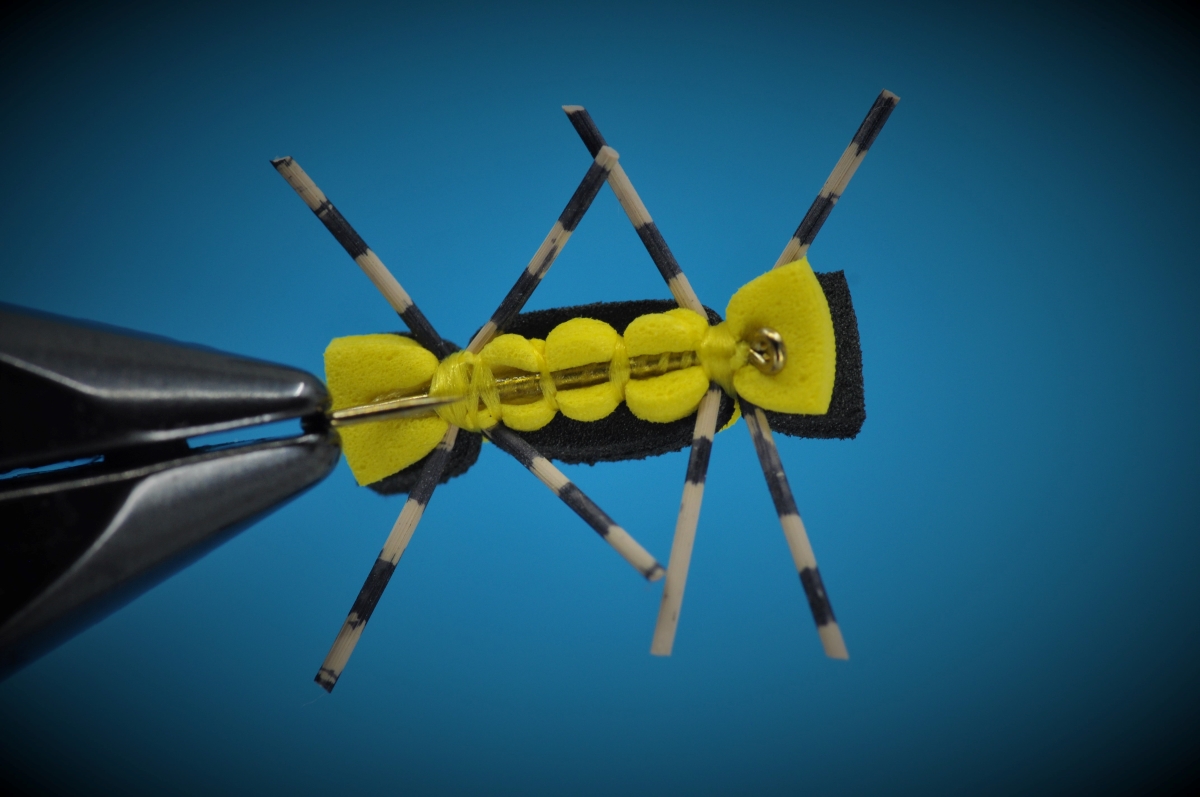
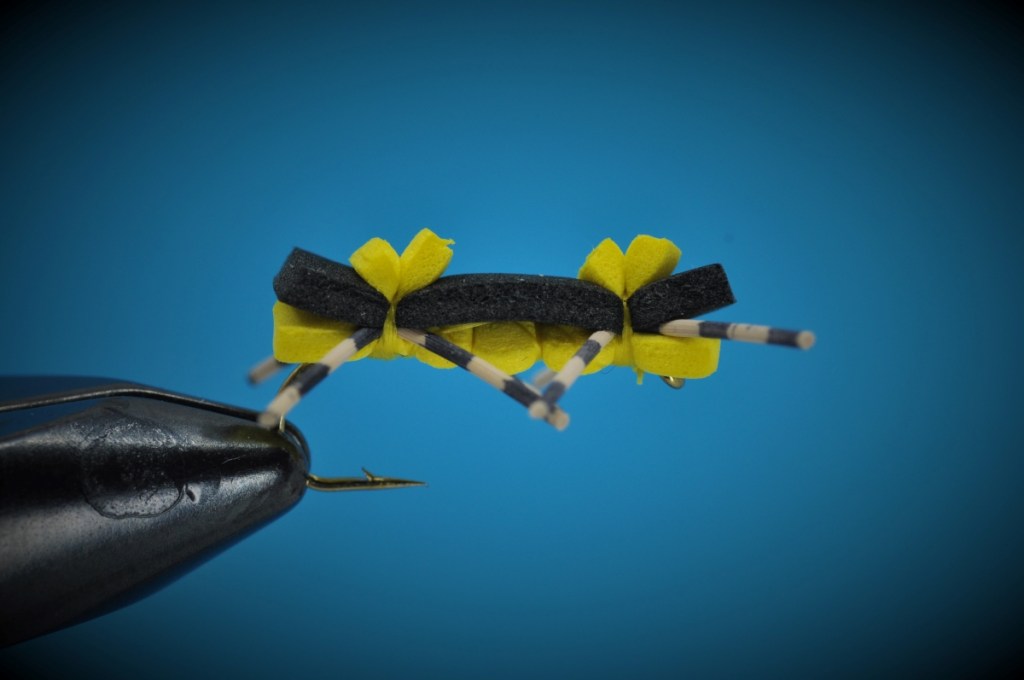
Chernobyl Ant Fly Step-by-Step:
Summer is in full swing here in south Louisiana, and, as the heat index consistently reaches triple digits, my mind can’t help but drift to memories of cool mountain streams. Three years have passed since I last stepped foot in such a stream, but time has done nothing to blunt the memory. There’s really not much that compares with rushing waters, wild flower filled meadows and small, wild trout erupting on large terrestrials.
This is the time of year when foam rules the trout stream. A time when large, impressionistic flies, as buoyant as any indicator, can trigger explosive strikes. Yet, when Utah guide, Mark Forsland, first tied the pattern originally dubbed the “Black Mamba” some 30 years ago, such patterns were a novelty. A size 6 “Ant” that only nuclear disaster could have produced, it was redubbed the Chernobyl Ant shortly thereafter. Perfect for supporting heavy droppers, the pattern has proven effective well beyond the western waters where it was created.
| Materials: | ||
|---|---|---|
 3x Long All-Purpose (#6-10) 3x Long All-Purpose (#6-10) |  140 Denier (colored to match) 140 Denier (colored to match) |  2-mm Foam (Yellow or Orange) 2-mm Foam (Yellow or Orange) |
 2-mm Foam (Black) 2-mm Foam (Black) |  Round Legs (Barred; Colored to match) Round Legs (Barred; Colored to match) |
Disclosure: This post contains affiliate links. A small commission may be paid for purchases made through these links.
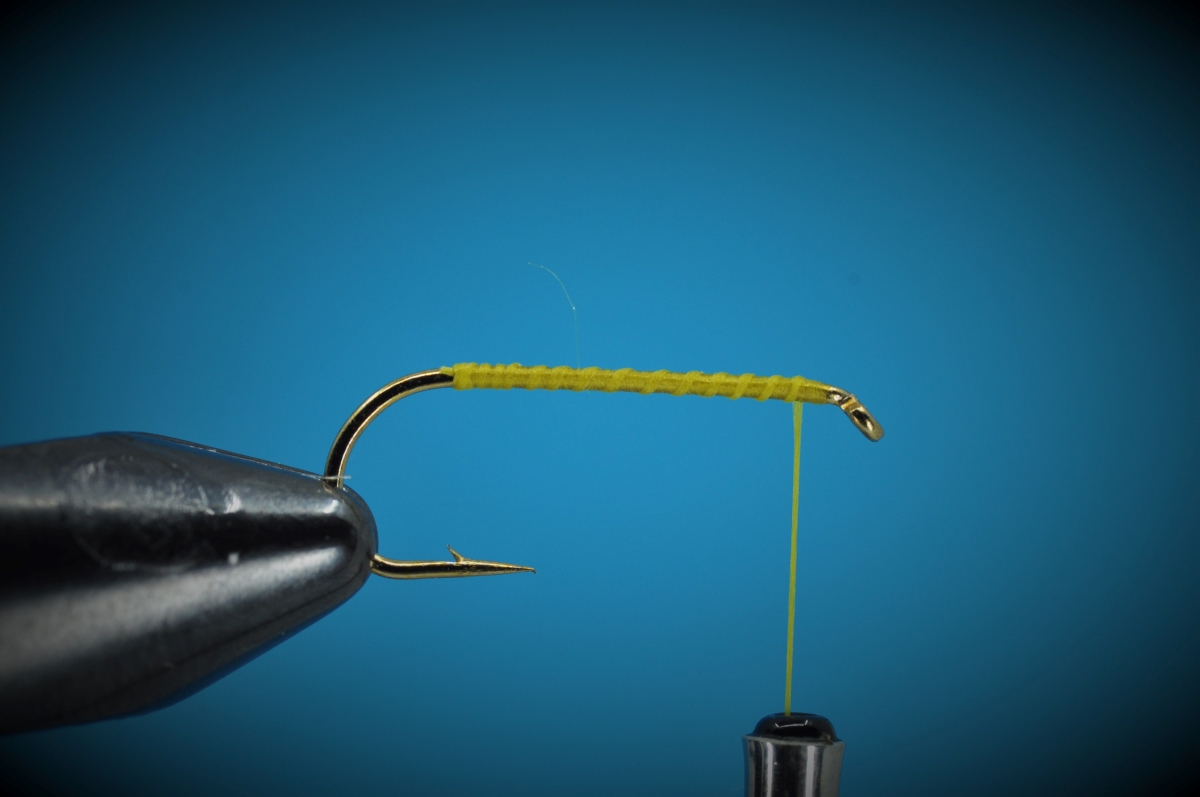
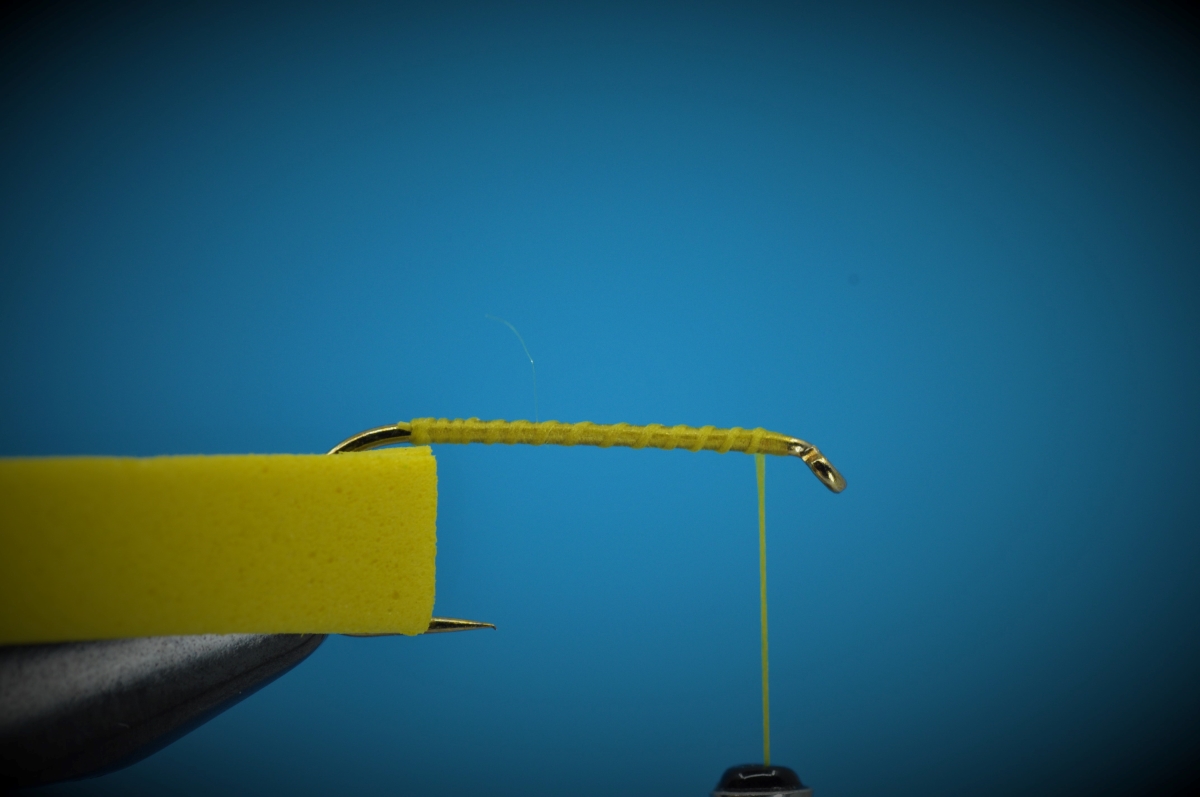
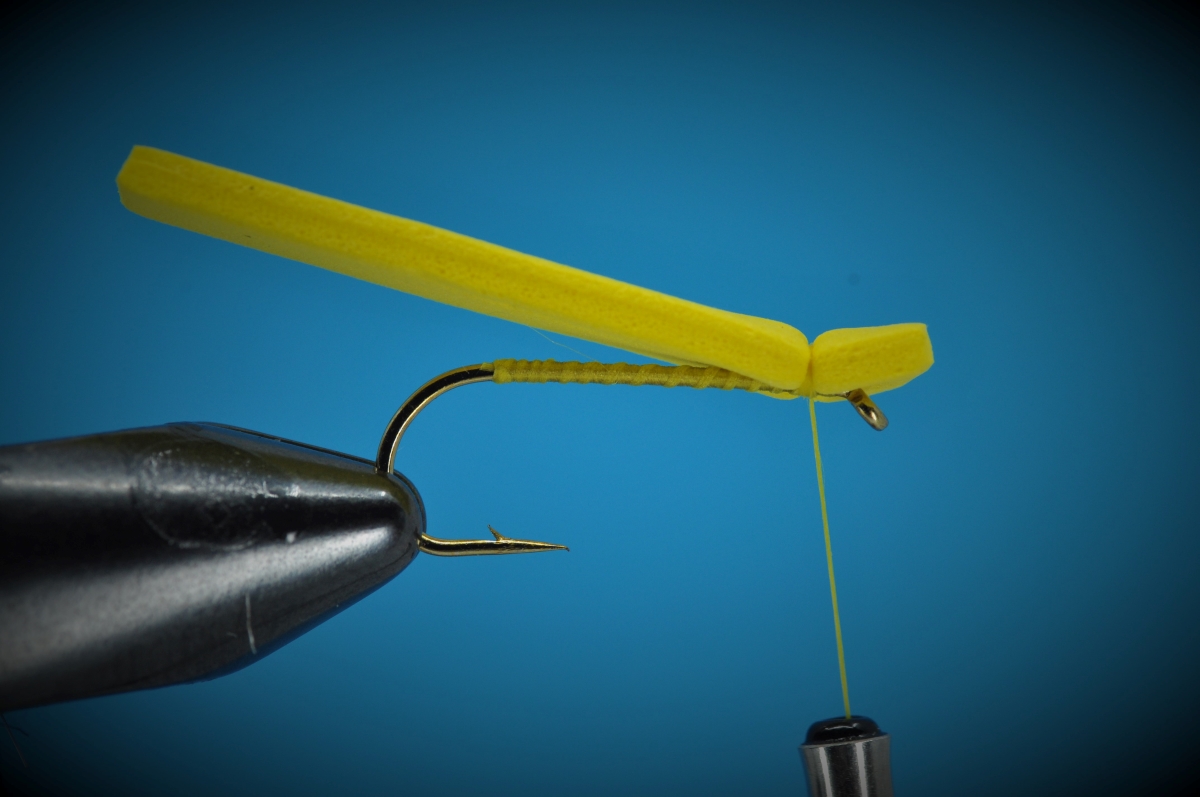
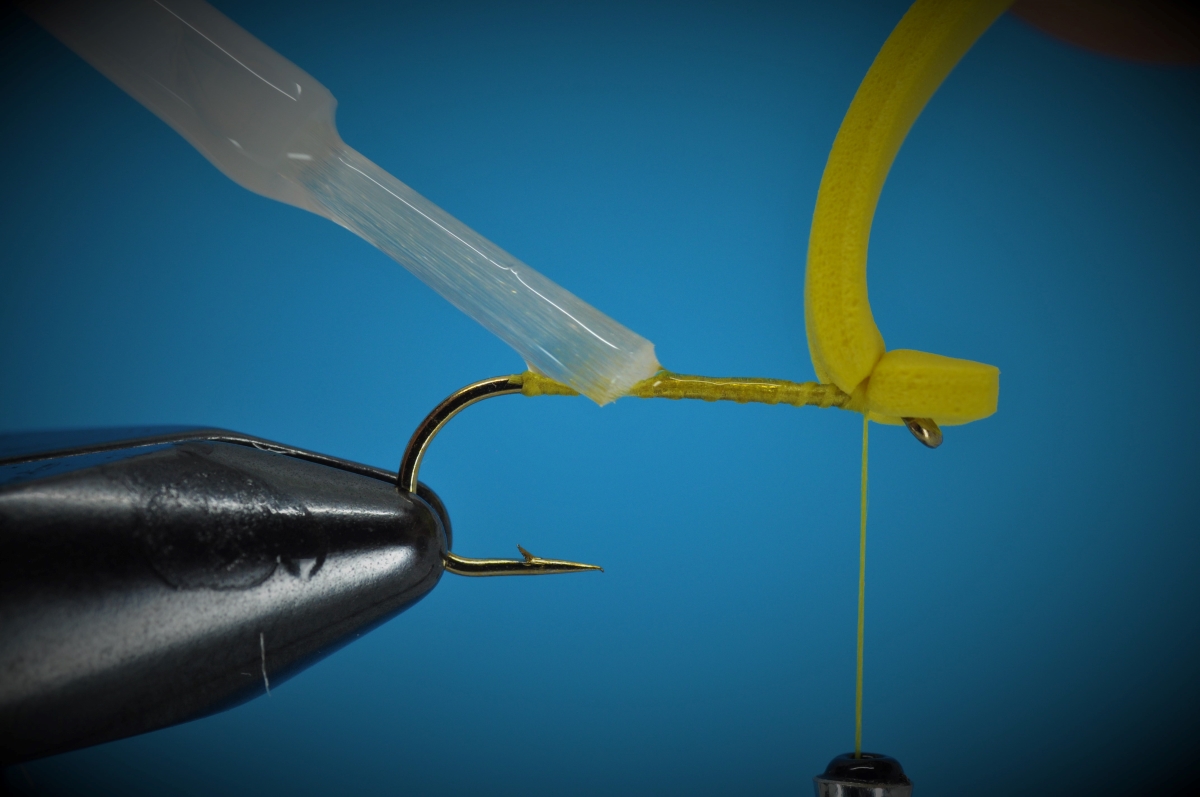
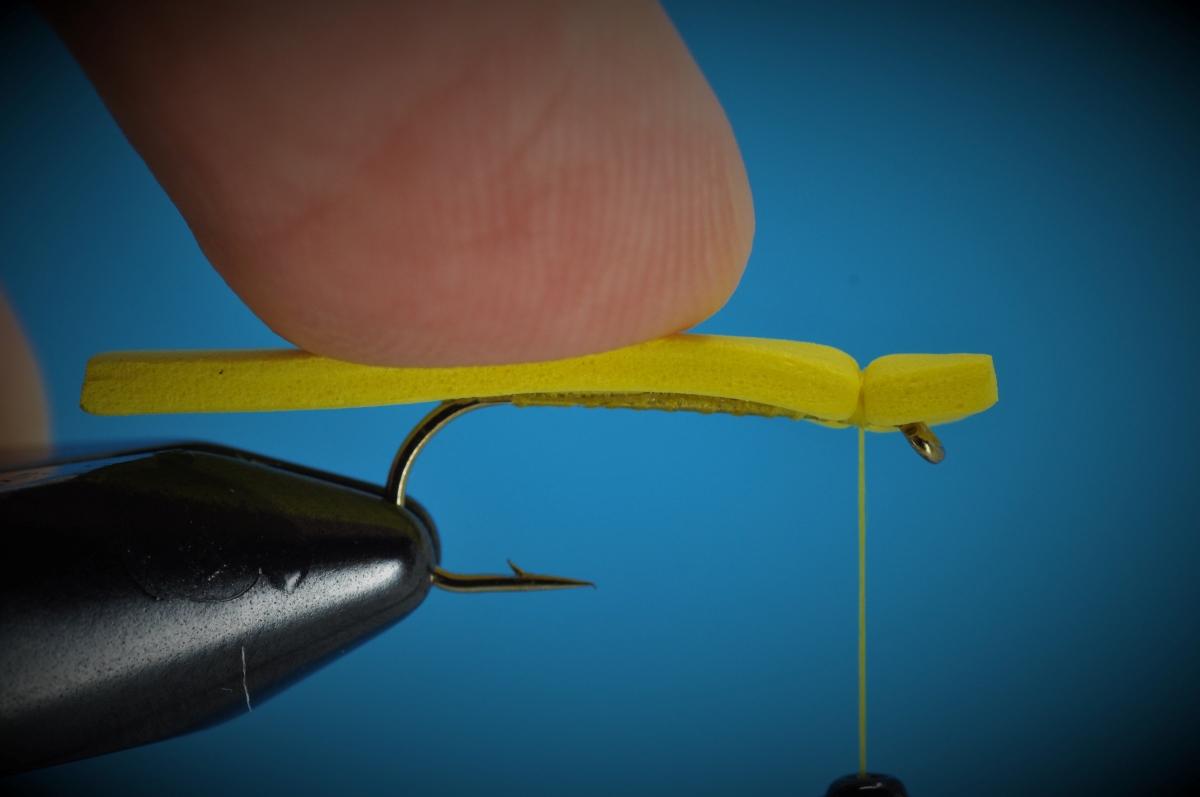
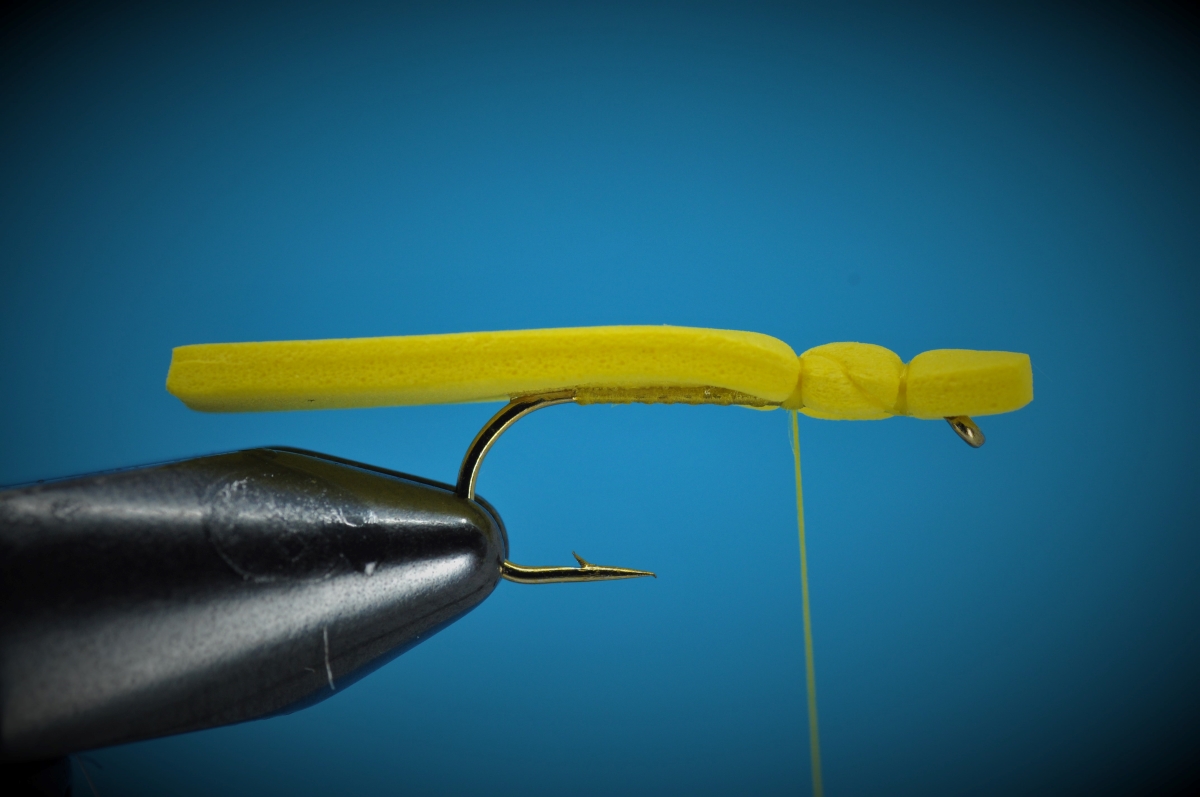
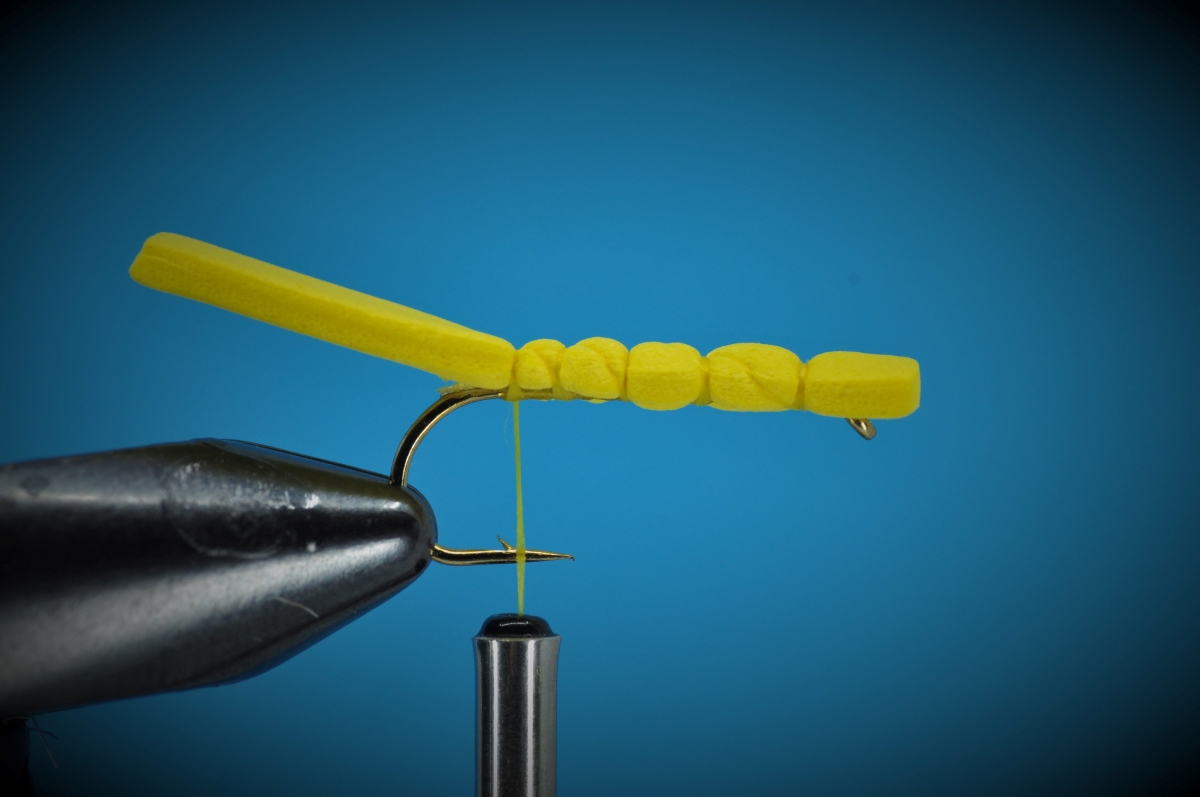
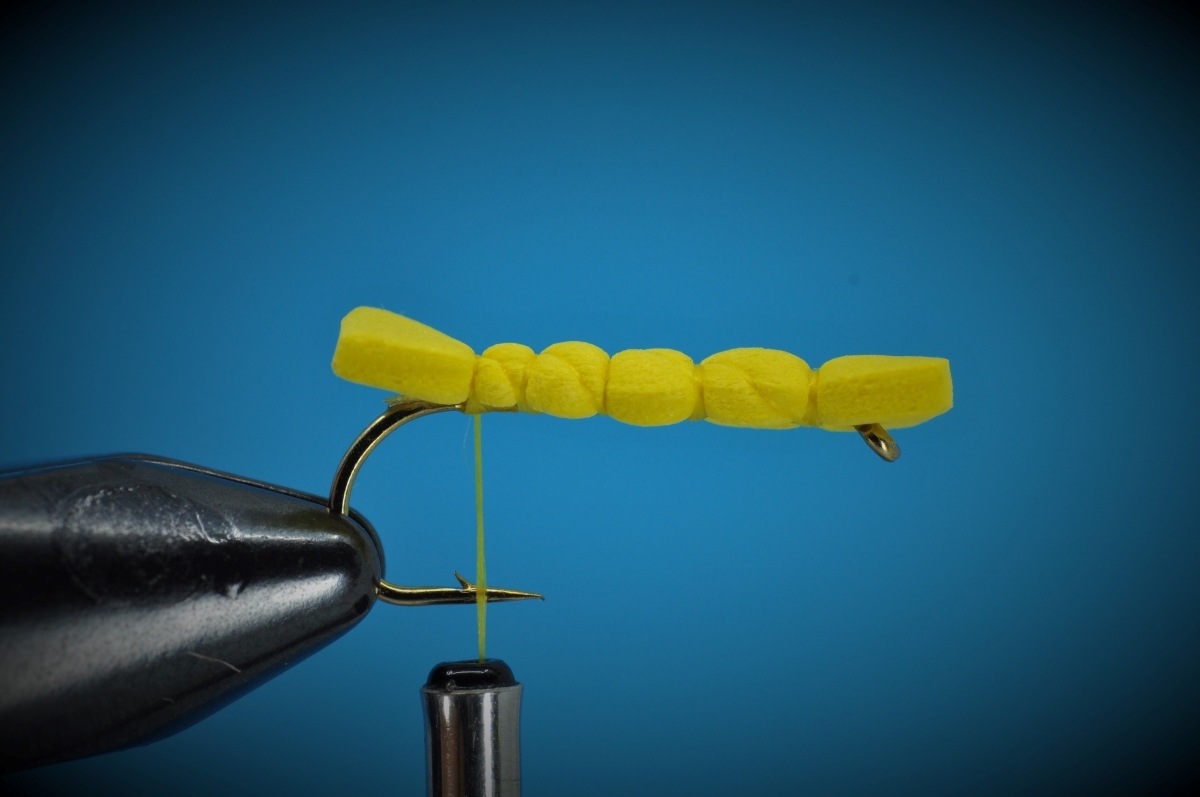
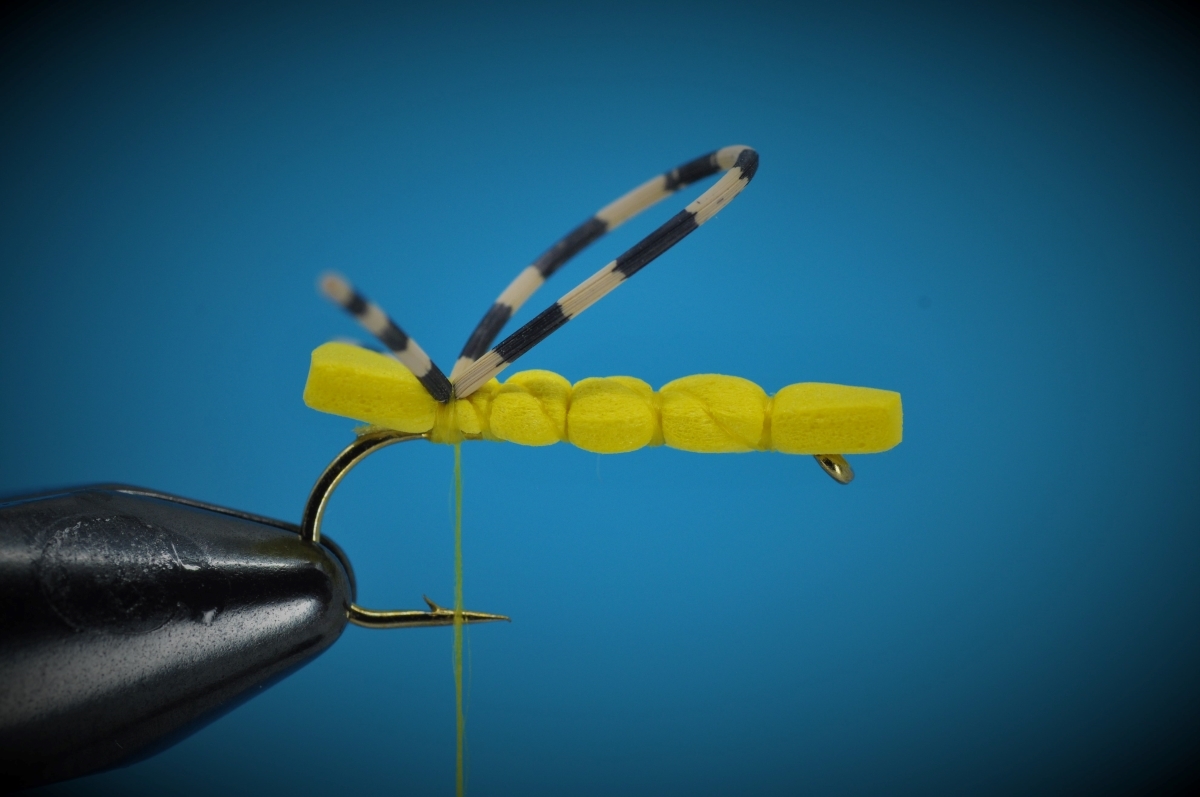
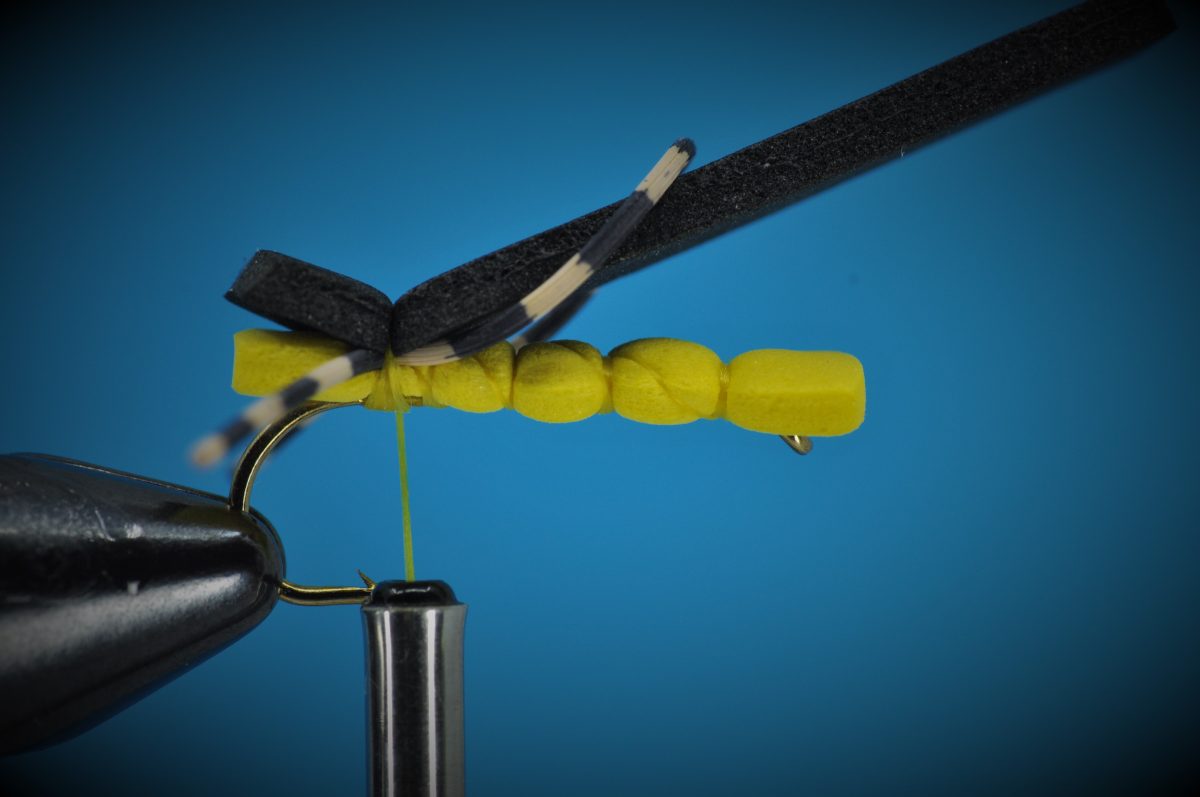
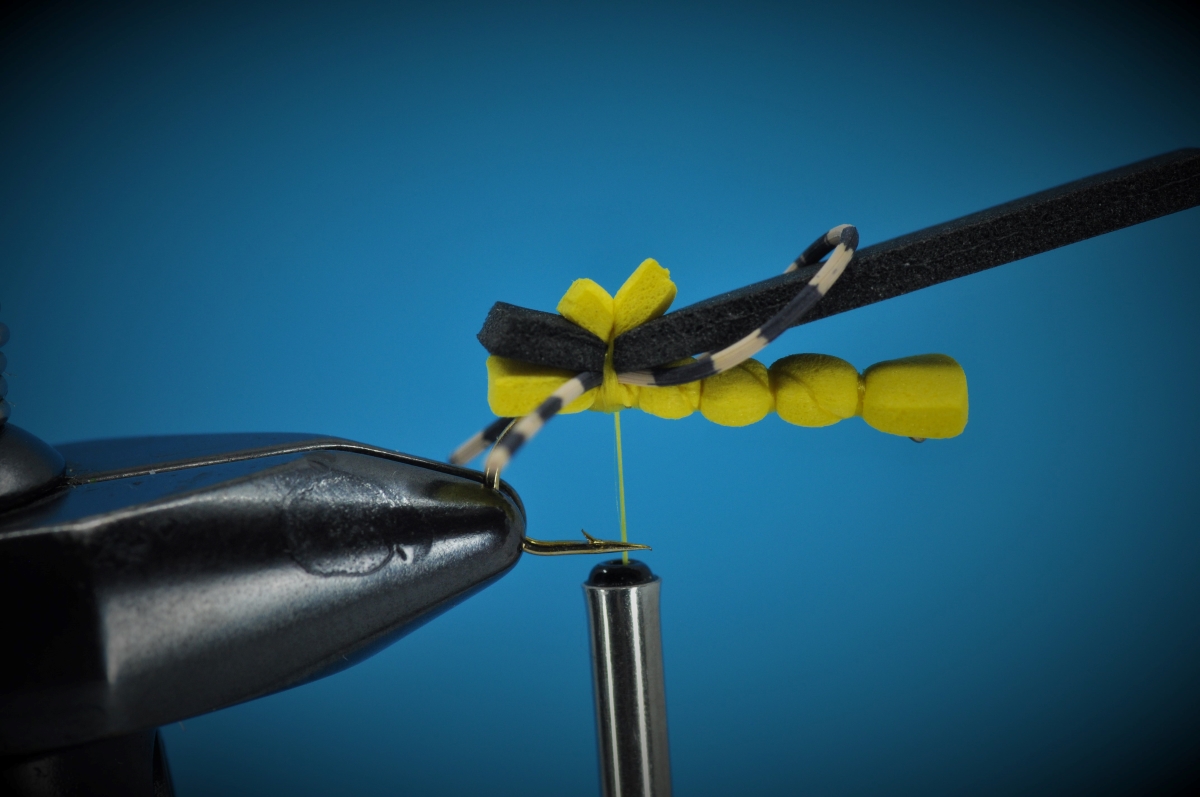
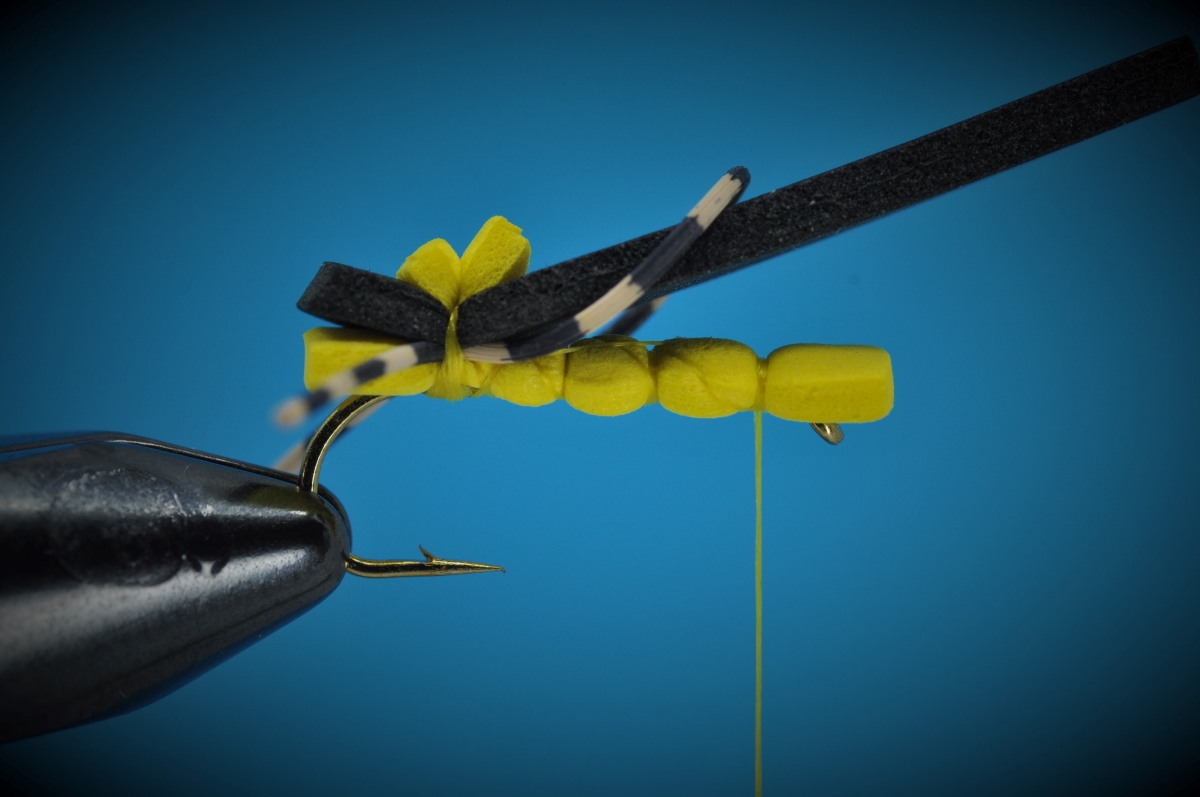
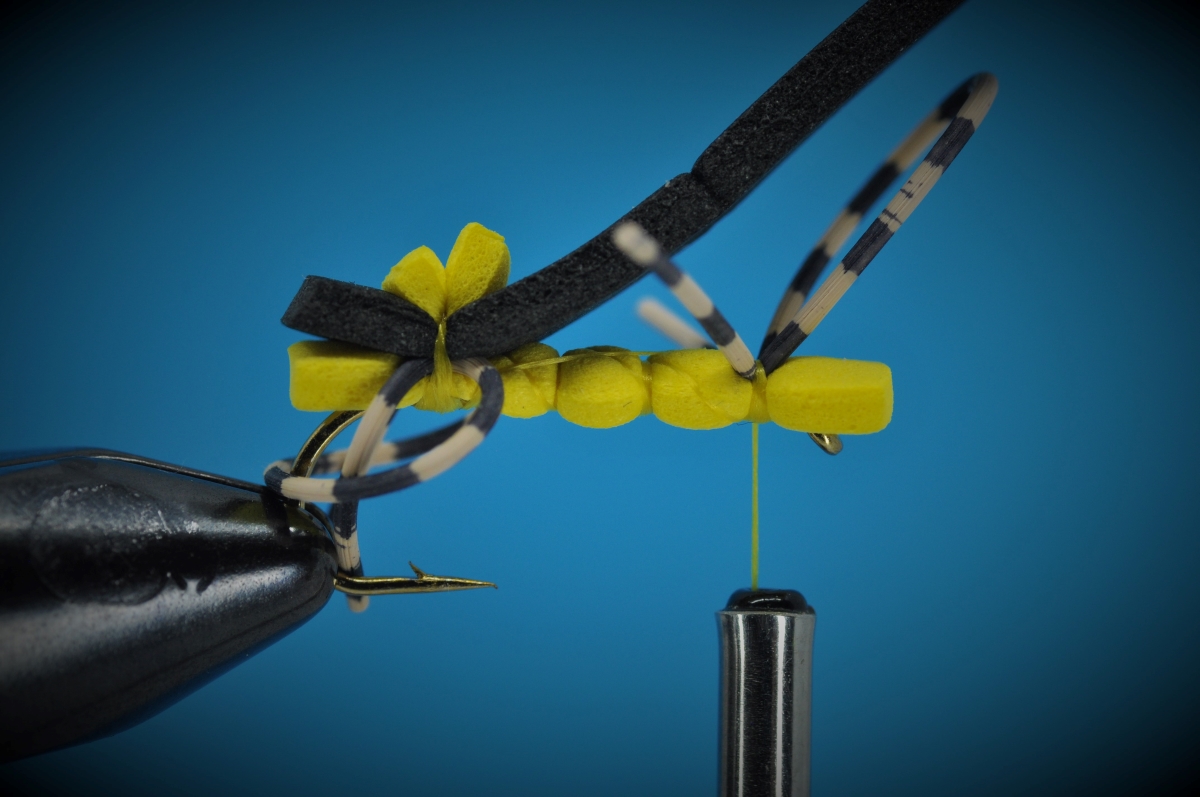
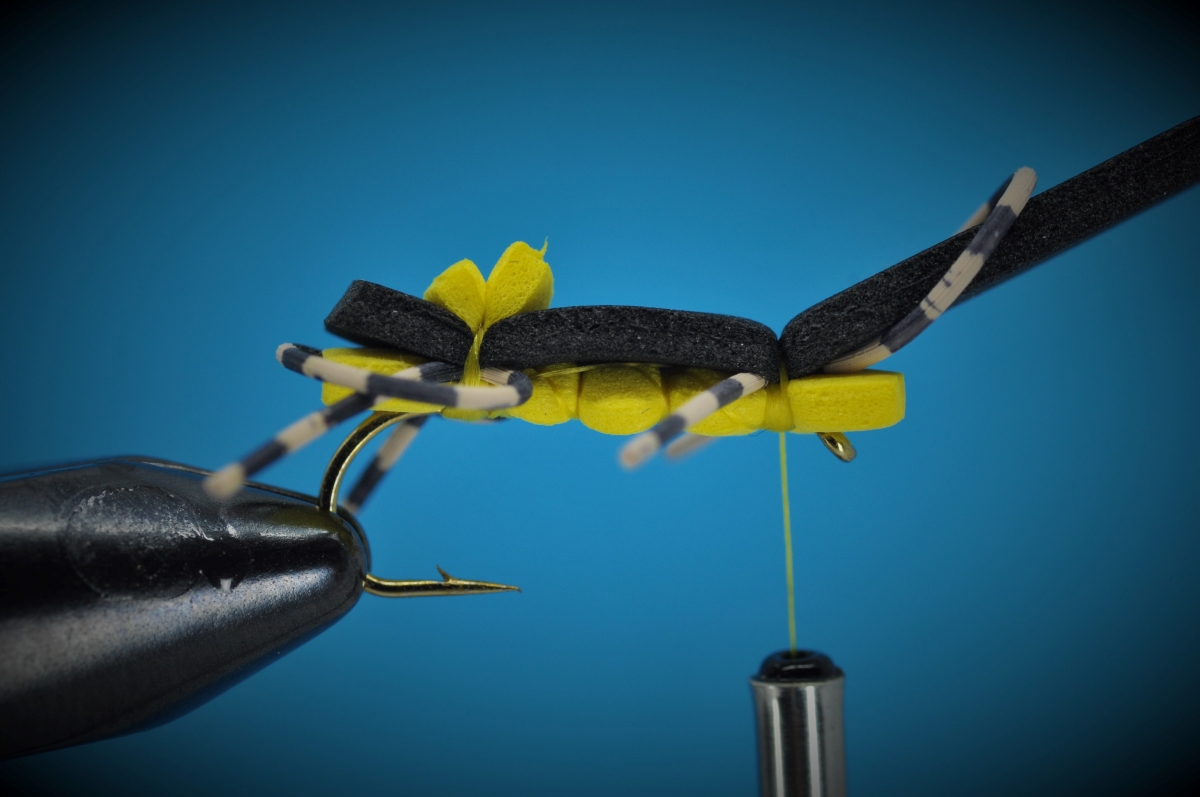
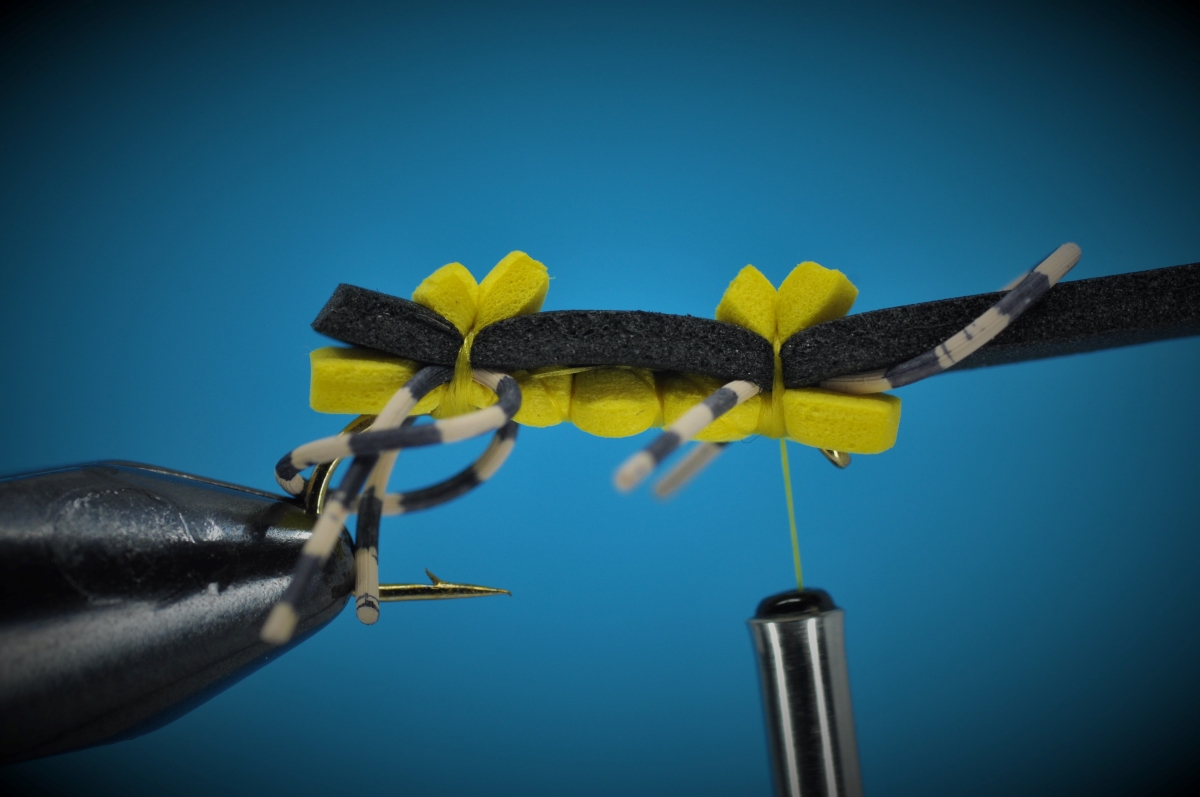
Chernobyl Ant Fly Step-by-Step Tying Instructions:
(Mobile Viewers: Click images to enlarge or rotate phone to landscape)

Tips and Tricks
- Color Selection – Let’s face it. This pattern isn’t intended to closely mimic any creature found in nature. It is purely an attractor, and, as such, there’s no need to match the hatch. Instead, try this pattern in brighter colors yellow, orange or even pink may prove viable. Though, it doesn’t hurt to tie a few in more subdued tones as well.
- Straight Lines – If you’re like me, cutting straight lines free hand may not be a strength. My lines end up noticeably uneven or have a distinct taper in width from one end to the other. While not the end of the world, there is an easy way to prevent this: Pick up a paper cutter from your local craft/hobby supply store. Though designed for paper, these cutters can easily handle 2-mm and even 3-mm foam. Just line up your foam to the desired width and chop. In under a minute, you can turn a sheet of craft foam into strips of material in your desired width. Just cut to length, and you’re ready to tie.
- Substitutions and Variations- While the Chernobyl Ant is a stand alone pattern, it has also served as the template for a number of other well known and obscure patterns. As such, it is the perfect pattern for substitutions and experimentation. Consider replacing the foam hot spots with a zelon wing as in the Chubby Chernobyl. Or, if you prefer, swap out the foam legs for hackle as Mark Forsland did when he initially experimented with this pattern.
Proof of Concept
Admittedly, the Chernobyl Ant has yet to grace my fly line. A handful of the radioactive arthropods did find their way into a friend’s box, however. With two weeks of fishing western Montana on his docket, he’ll hopefully have something to share before too long…
Tight Line!
Chris
Species Caught on the Chernobyl Ant to Date:
Enjoy our Content?
Subscribe below to be notified anytime a new Step-by-Step is added.
Support our Content
Enjoy our content & want to help support our work? Consider clicking one of the Ads below the article if something catches your attention. Each click brings in a small bit of revenue to help offset the cost of maintaining & hosting this great site!