Looking for something else?
Try one of these!
DT Special Streamer Step-by-Step:
As I’ve mentioned before, there’s something to be said for simplicity in fly tying. Far too often, tyers spend countless hours perfecting detailed representations of specific prey species. Yet, when it comes down to it, all that is really needed is an impressionistic representation. An illusion of prey that mimics little more than silhouette and motion. Friend and frequent commenter, Jim S., seems to hold a similar view.
A talented tyer, Jim has served as inspiration for a few of the patterns shared on this blog. So, I made a point of taking note when he shared his favorite flies of 2022 in my Top 5 Fly post this past December. In particular, his comment reminded me of a pattern I’ve long intended to tie for this blog: the DT Special.
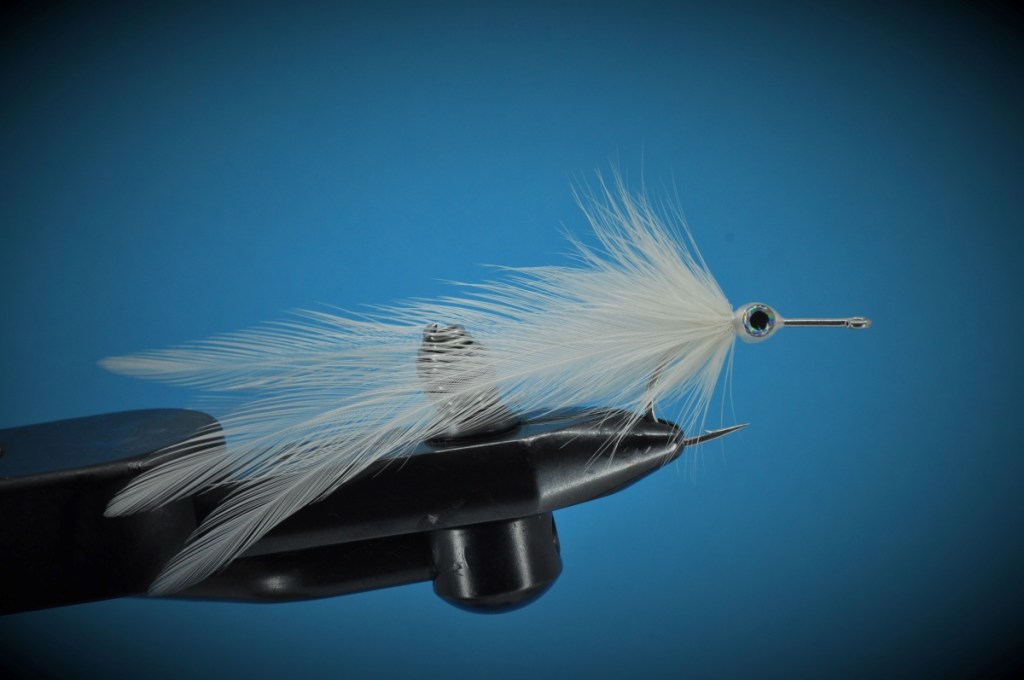
A breeze to tie, and requiring little more than thread, hackle and flash, this pattern is the epitome of simplicity. More importantly though, it catches fish and is widely accepted as one of the best flies for targeting snook in the surf.
| Materials: | ||
|---|---|---|
 Gamakatsu SL11-3H (#2-1/0) Gamakatsu SL11-3H (#2-1/0) |  6/0 or 140-Denier (White) 6/0 or 140-Denier (White) |  Streamer Hackle (White) Streamer Hackle (White) |
 Streamer Hackle (White) Streamer Hackle (White) |  Adhesive Eyes (Optional) Adhesive Eyes (Optional) |  UV Resin or Epoxy UV Resin or Epoxy |
Disclosure: This post contains affiliate links. A small commission may be paid for purchases made through these links.
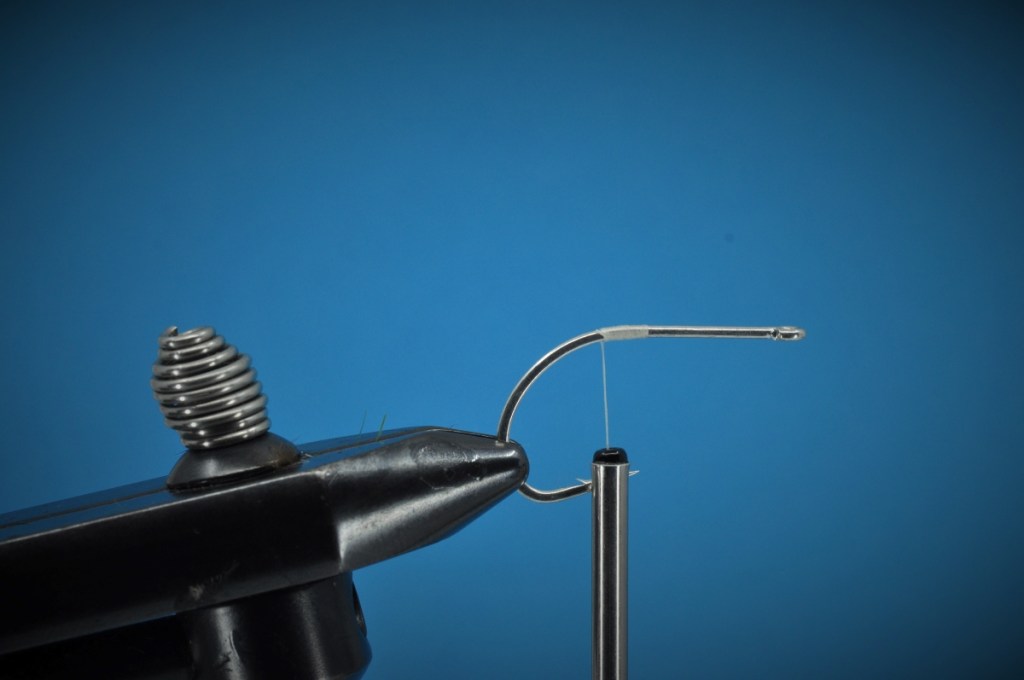
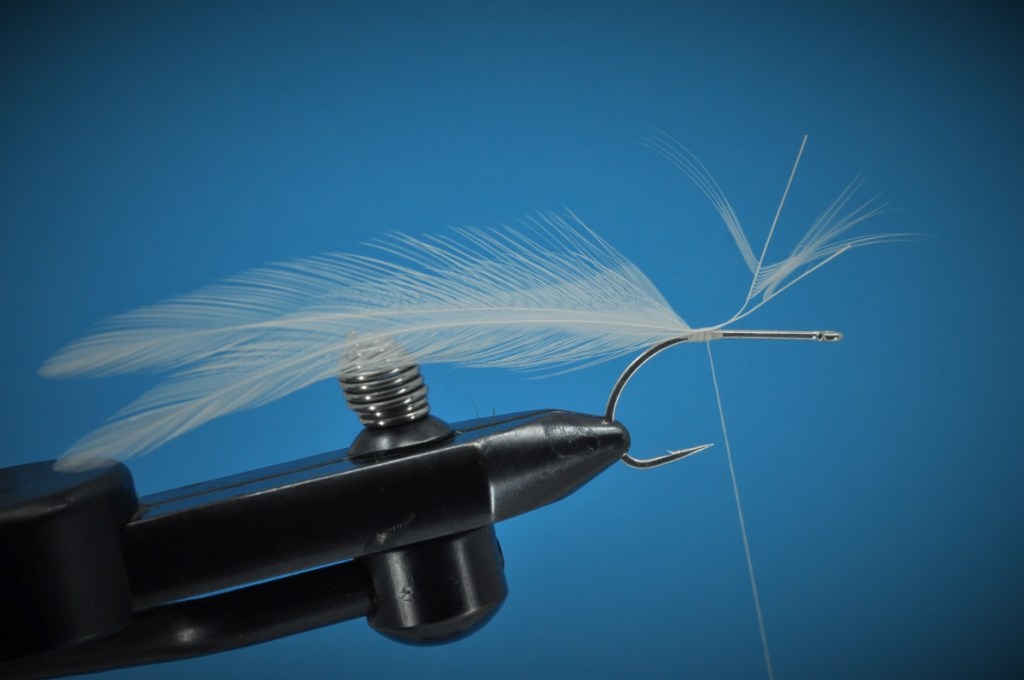
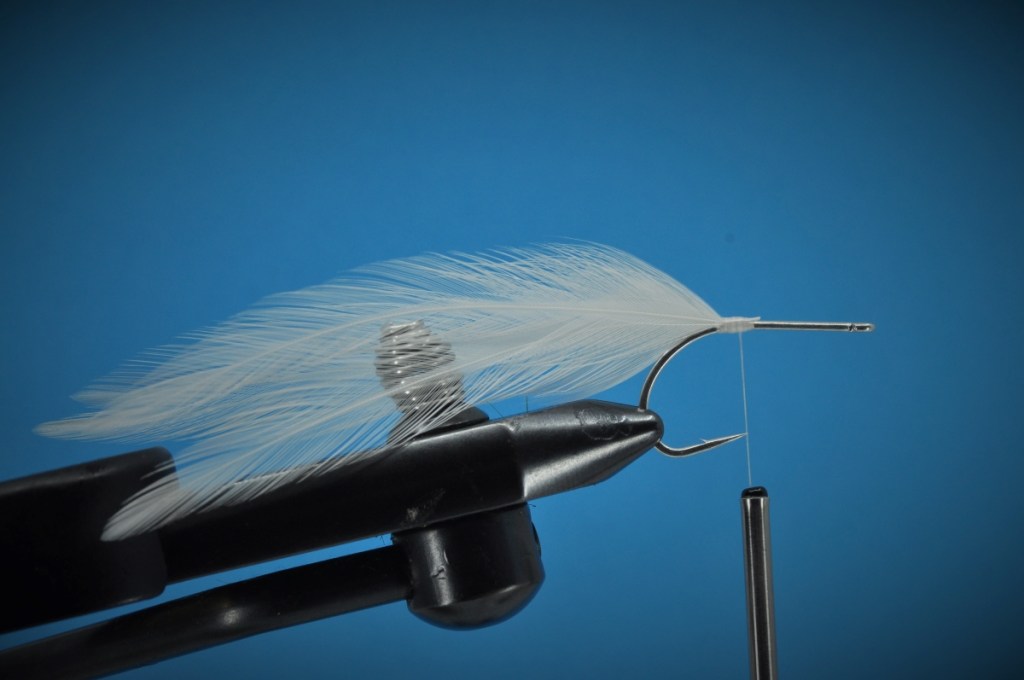
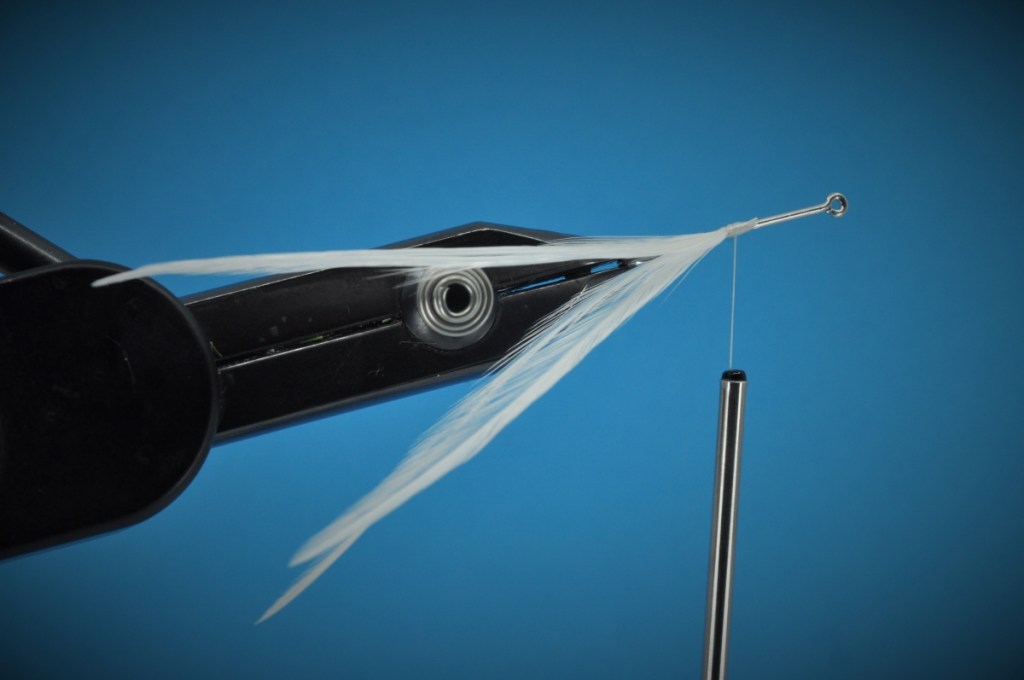
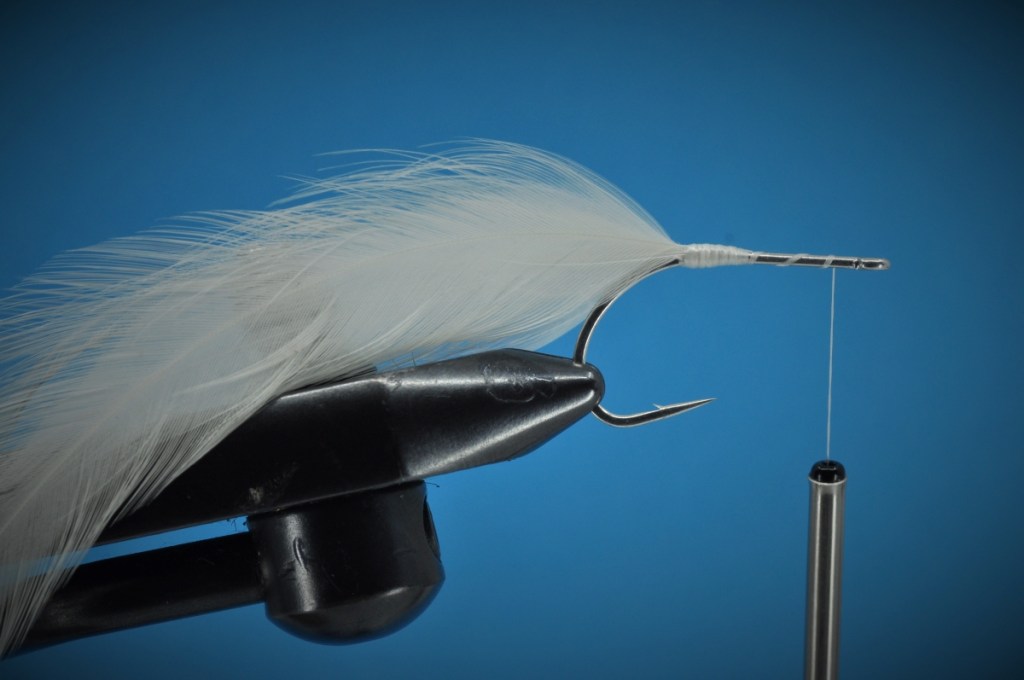
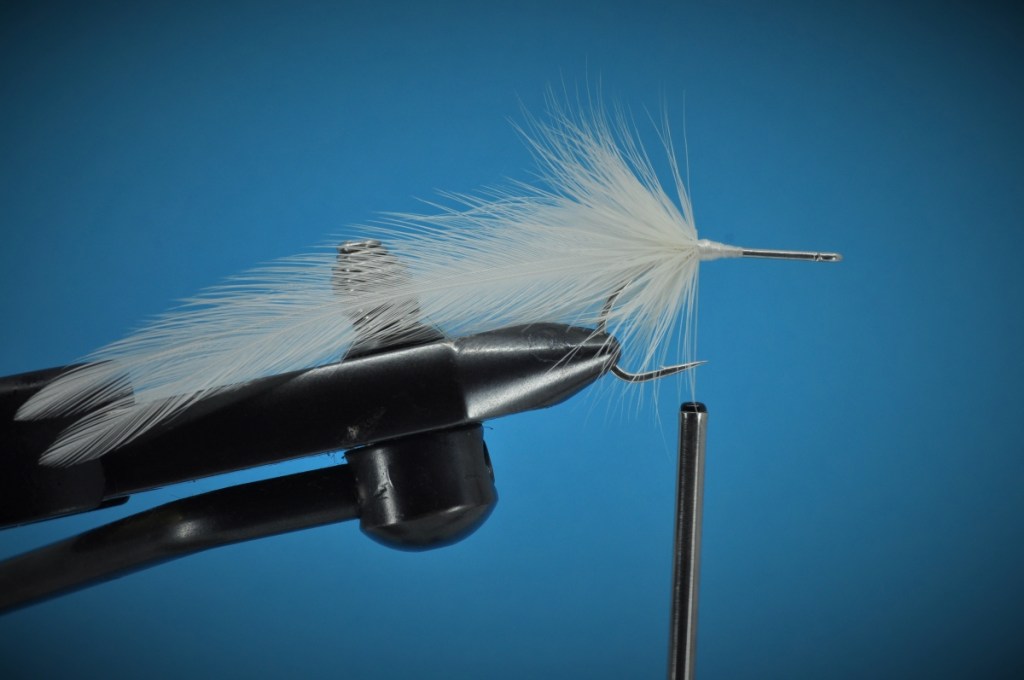
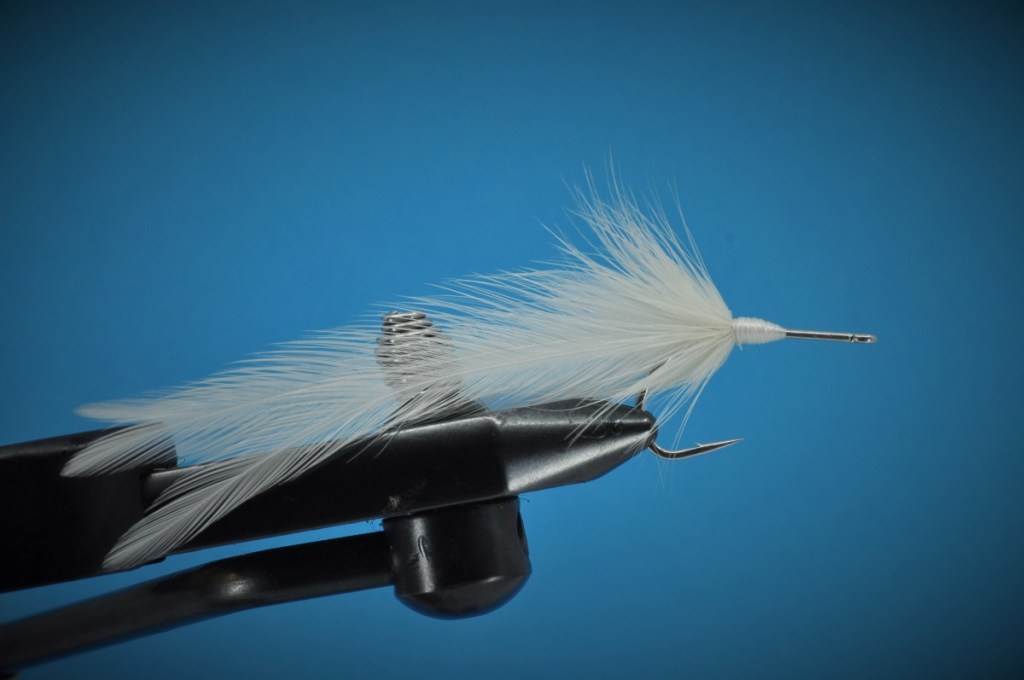
DT Special Streamer Step-by-Step Tying Instructions:
(Mobile Viewers: Click images to enlarge or rotate phone to landscape)
Tips and Tricks
- Don’t forget the flash – Sometimes the mind drifts a bit when tying, and it’s easy (especially when working on new patterns) to skip a step in the process. Such was the case with the above tutorial. Flash should have been added to the tail between steps 3 & 4, but was forgotten in the moment. While unlikely to be a deal breaker for the fish, try to remember this step when tying the above pattern yourself. You never know when that extra bit of flash might trigger a strike.
- Epoxy vs UV Resin – Often times, I recommend the use of UV Resin for patterns that may have originally called for epoxy. While both serve a similar purpose, keep in mind that each has its own advantages. In the case of UV Resin, the advantage is expediency. The resin cures in a matter of seconds under UV light, and you’re ready to fish. However, it is also far less durable. Given these flies are being used to target large, predatory fish, this is a tradeoff every angler should consider. What matters more to you? Expediency while tying? Or durability in the field?
- Hotspot – Along with the optional eyes included in the tutorial above, a variation on the DT Special created by Steve Gibson includes a hotspot of red thread extending along the hook shank in front of the head. Consider adding a few of these to your box along with the classic DT Special tied above. You never know what the fish might be keying in on.
- A Flats Fly – While Jim primarily fishes this fly in the surf, he was kind enough to mention that it has also proven successful on the flats as well. There Jim replaces the hackle collar with one made of a dubbing brush. Both reds and sea trout have fallen for this variant.
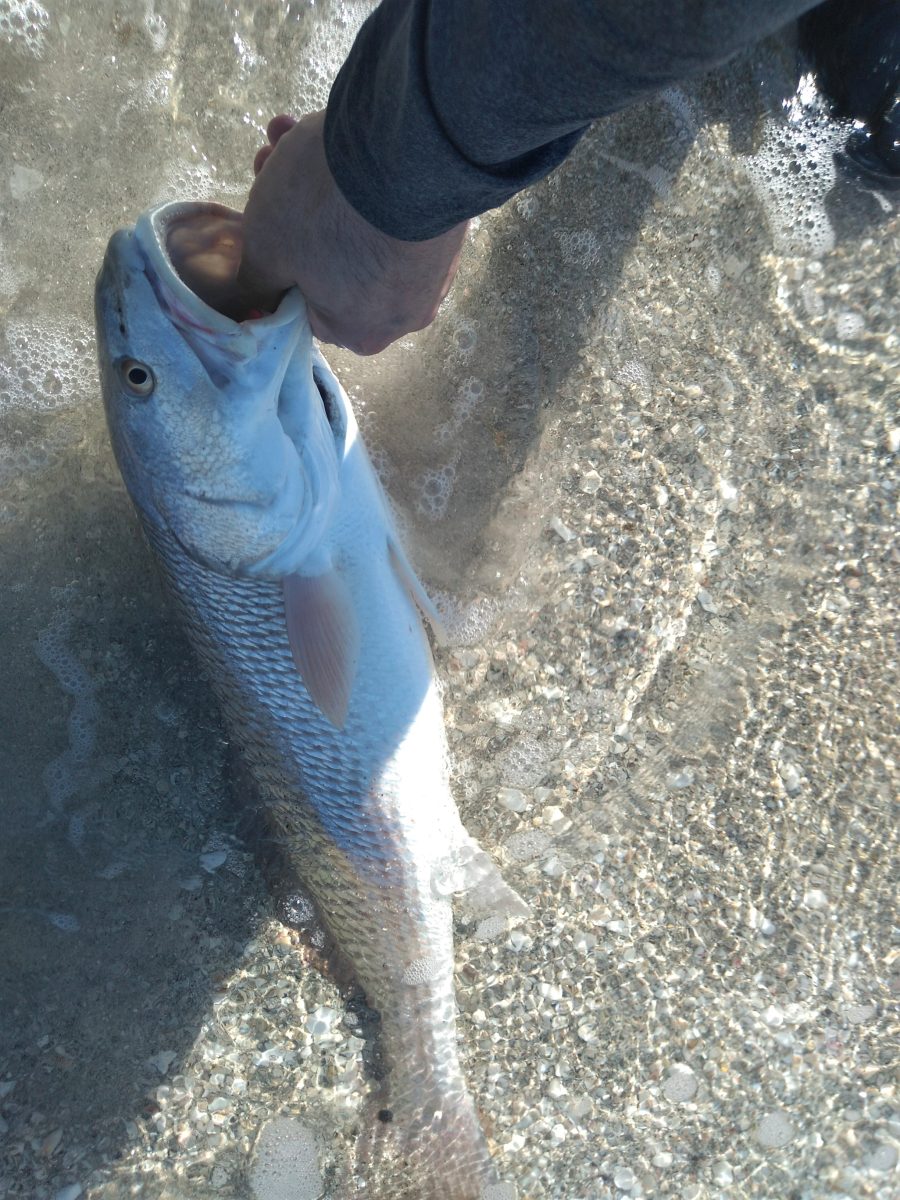
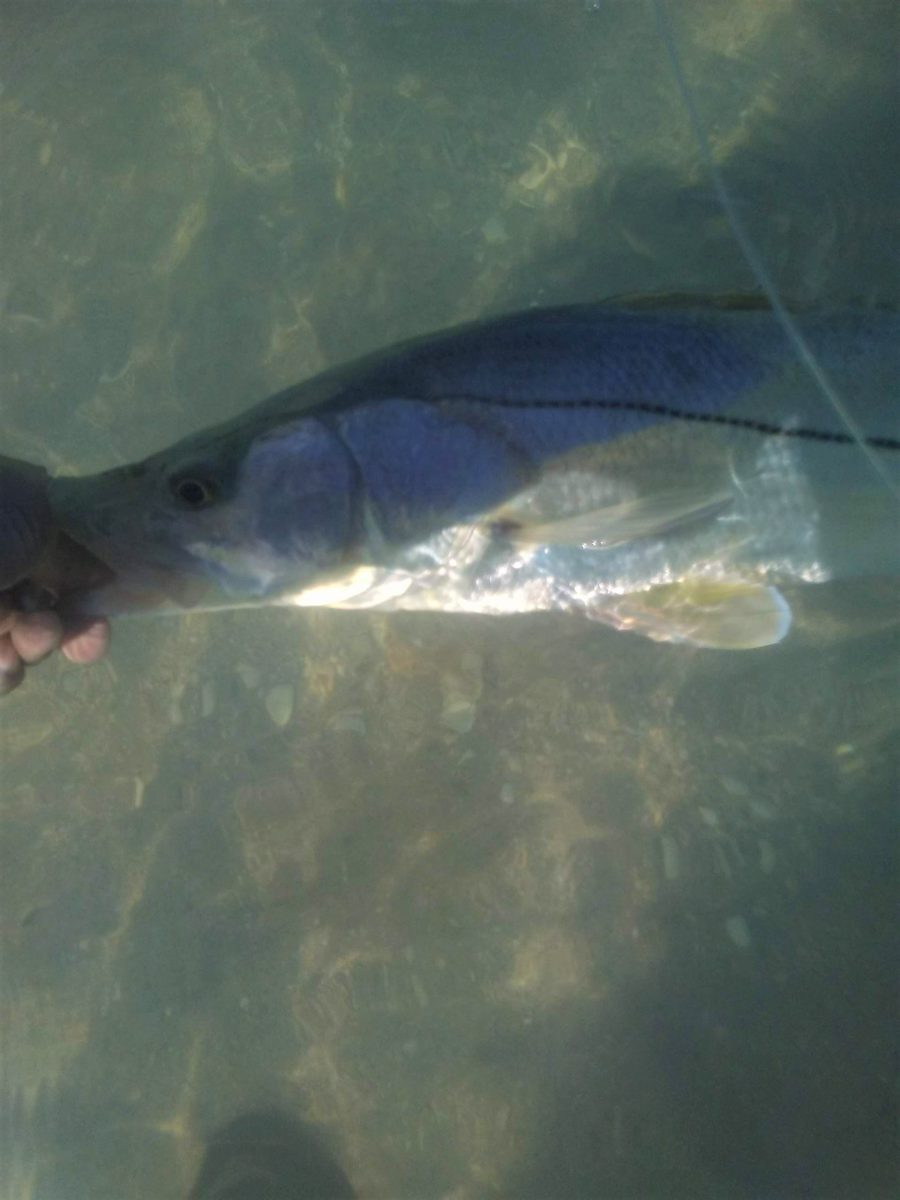
Proof of Concept
While I hope to put the DT Special to use the next time I find myself in Florida, I’ve yet to land a fish on this pattern.Jim, however, is quite versed in use of the DT Special and has landed numerous species on it while working the surf. Two such catches, a snook and redfish, are featured on the right.
Tight Line!
Chris
Enjoy our Content?
Subscribe below to be notified anytime a new Step-by-Step is added.
Support our Content
Enjoy our content & want to help support our work? Consider clicking one of the Ads below the article if something catches your attention. Each click brings in a small bit of revenue to help offset the cost of maintaining & hosting this great site!
Thanks for the kind words!