Looking for something else?
Try one of these!
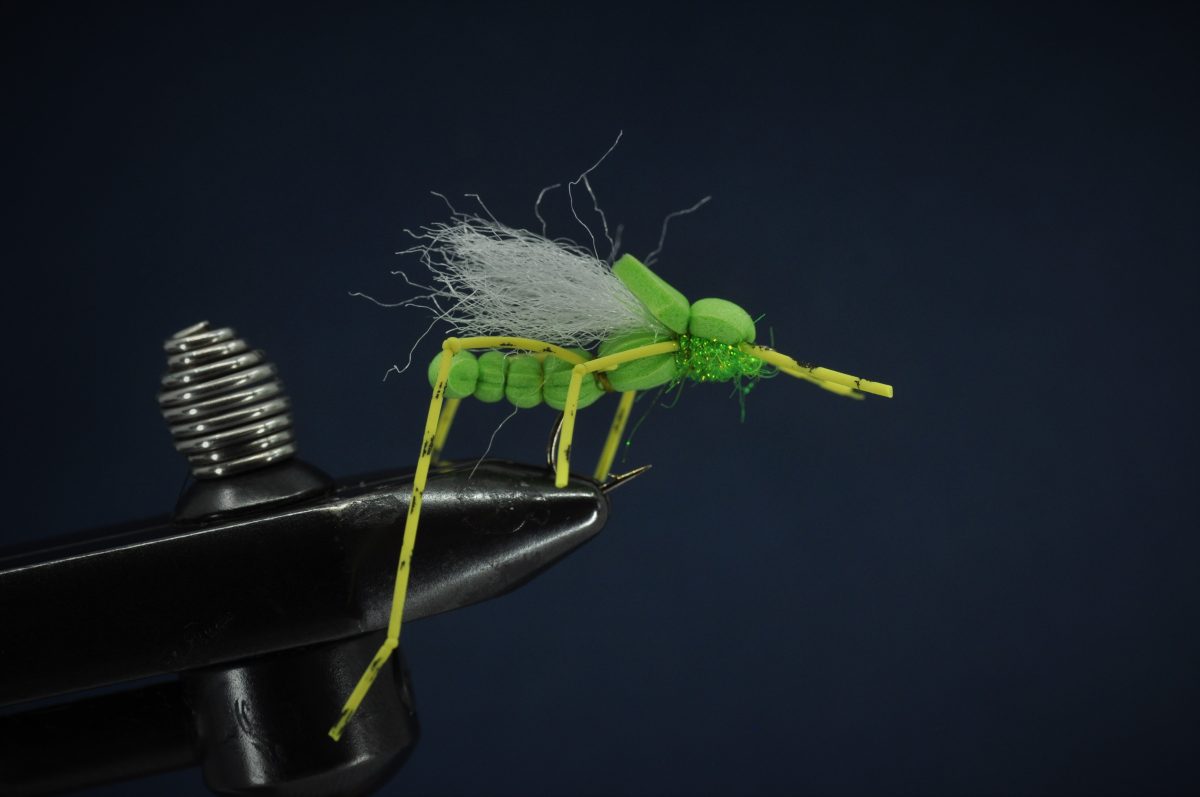
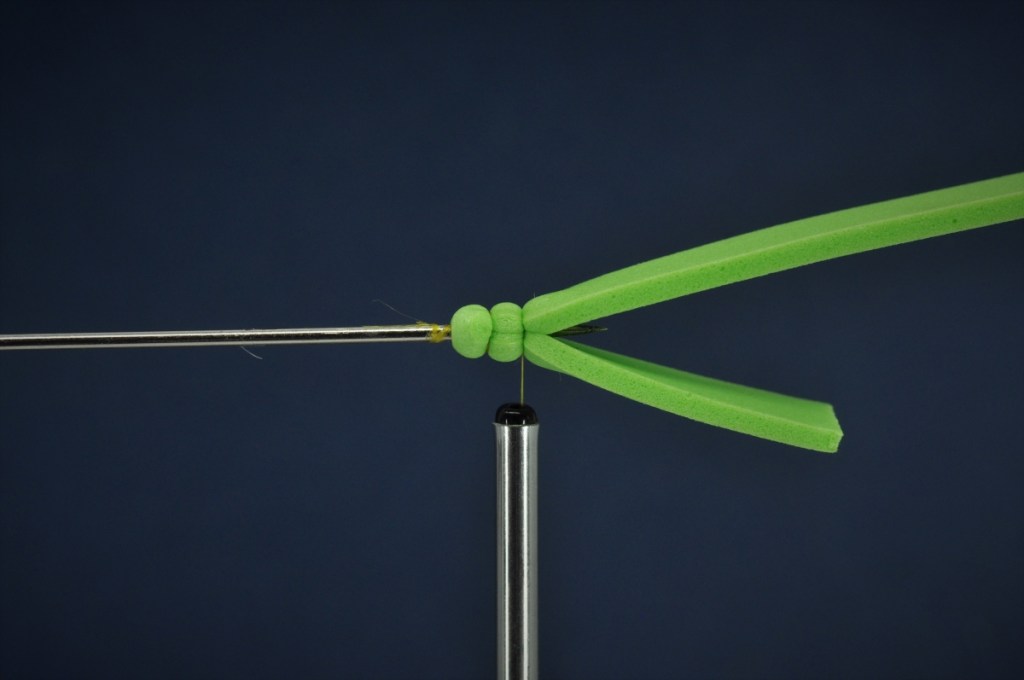
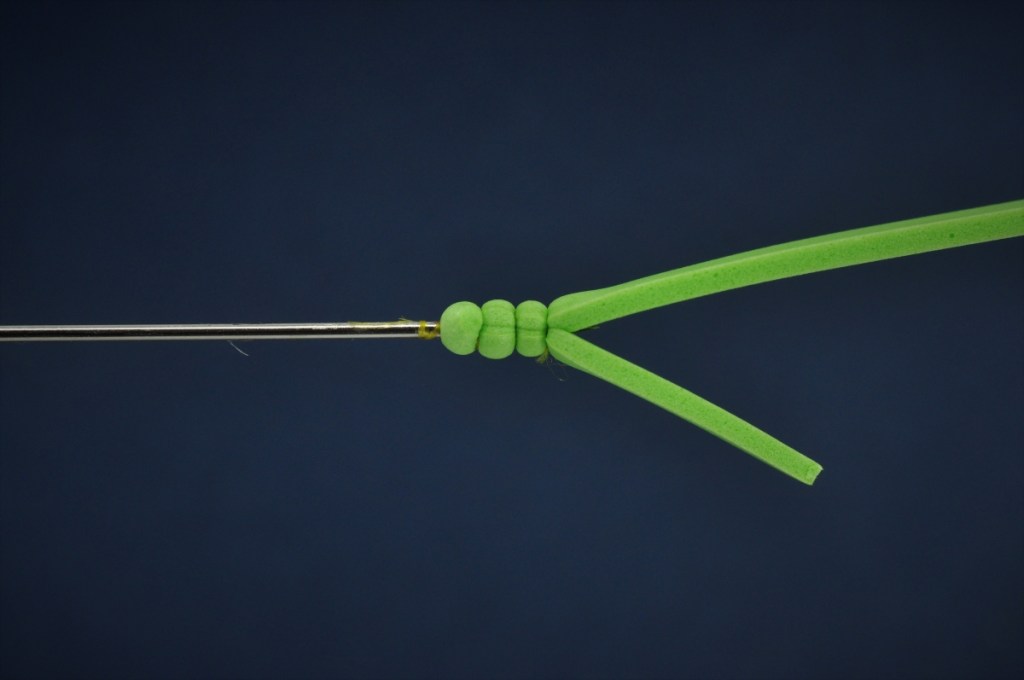
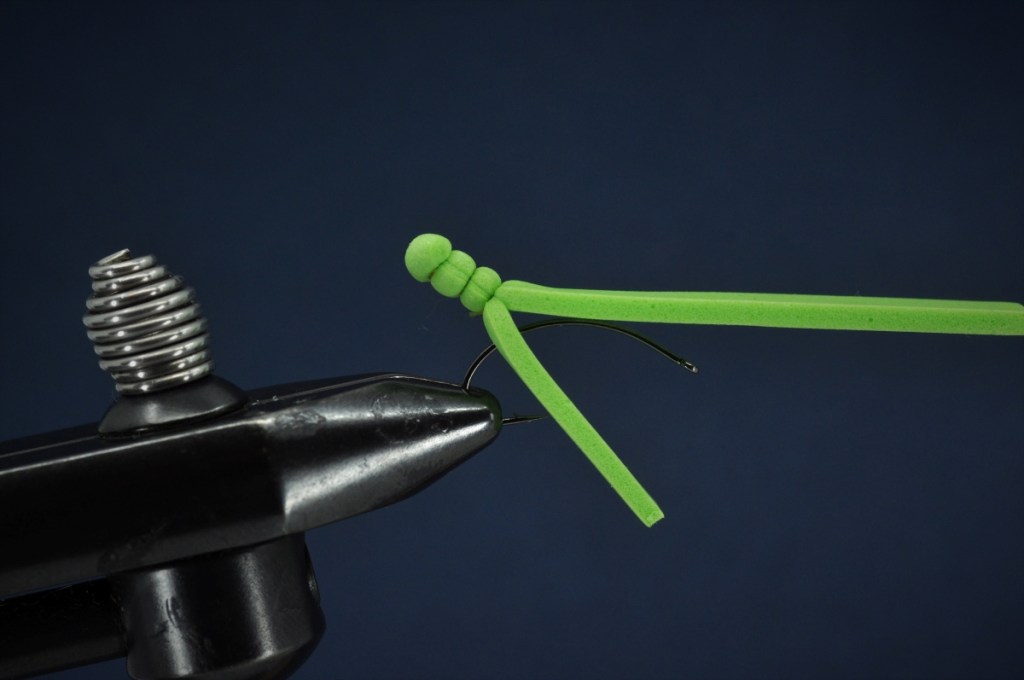
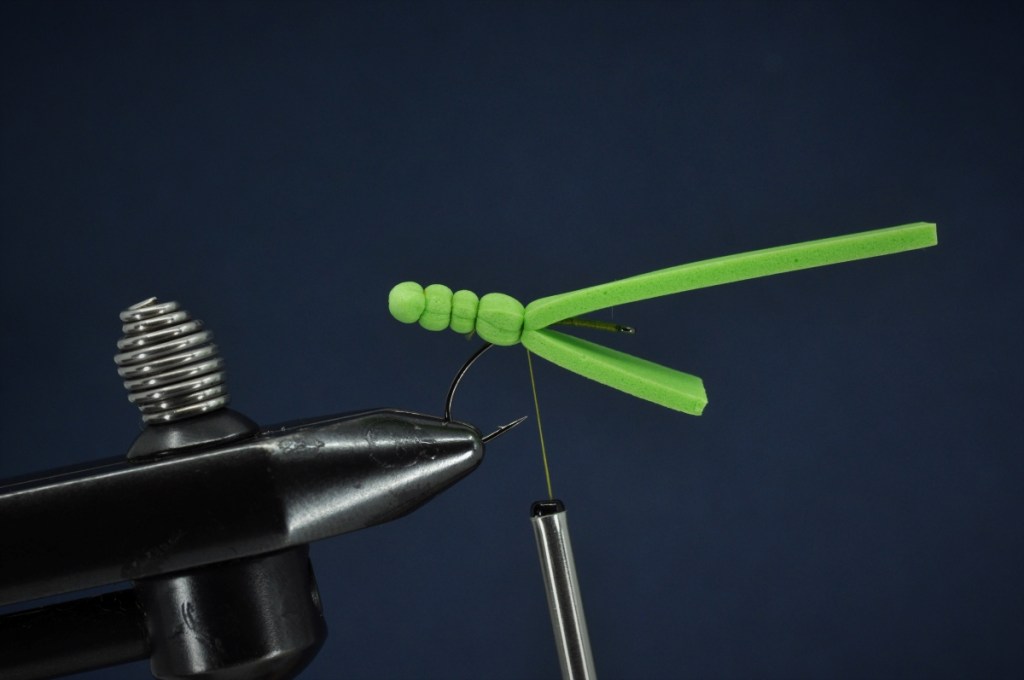
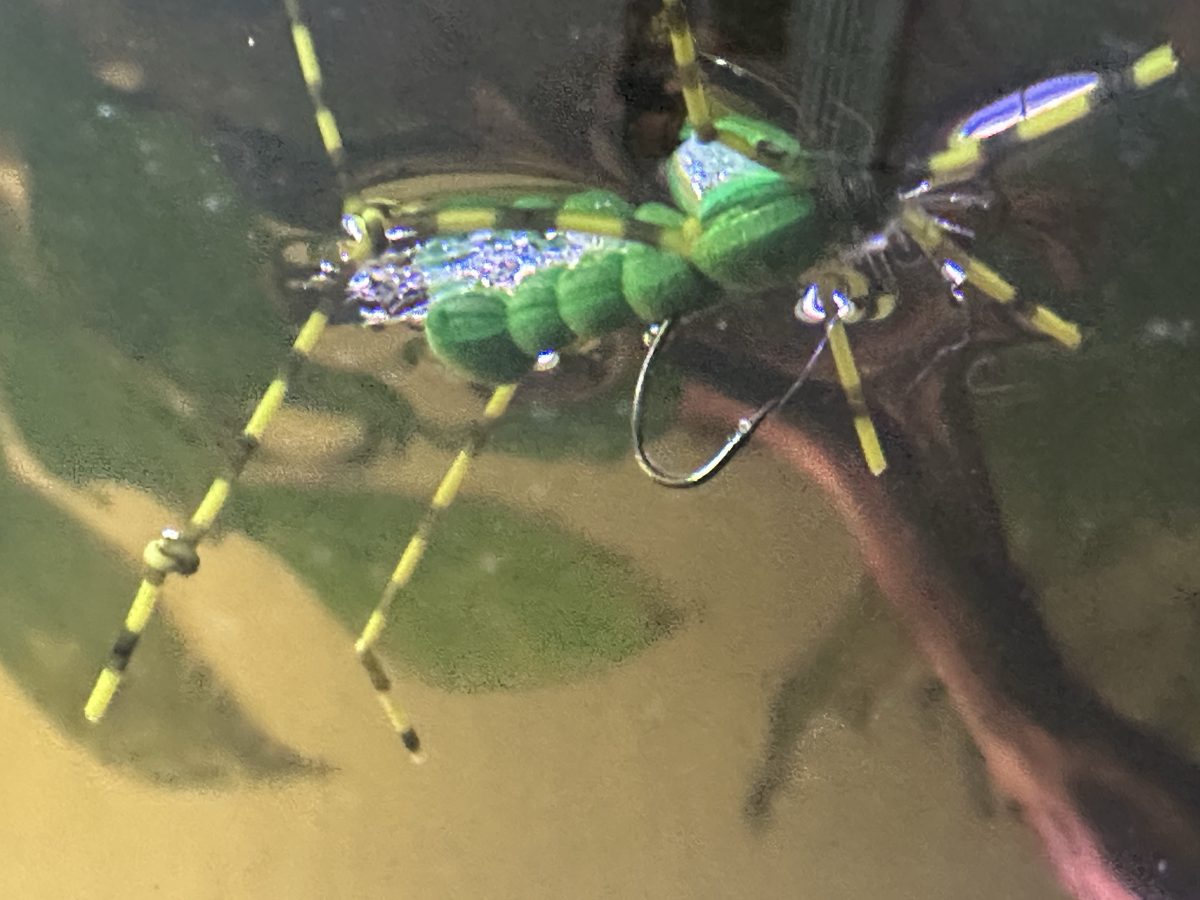
Extended Body Grasshopper Step-by-Step:
For those who have followed this blog for a while, it should be fairly evident that my step-by-step tutorials tend to be thematic. Whether focused on impending trips or simply seasonal shifts in fishing, the patterns presented are rarely haphazard in nature. Often time these themes are one-offs as I prepare for a specific trip (the Tamiami Trail for example), but others (those that are seasonal) tend to re-emerge with each passing year.
During the heat of summer, that often means a focus on terrestrials. Those high-floating “fun with foam” patterns as applicable on a high mountain stream as they are on our local waters here in south Louisiana. Everything feeds on terrestrials after all. With that in mind, I’ve decided to kick off this summer’s terrestrial season with an extended-body grasshopper pattern that I recently tied up with the folks at KFF in Alexandria.
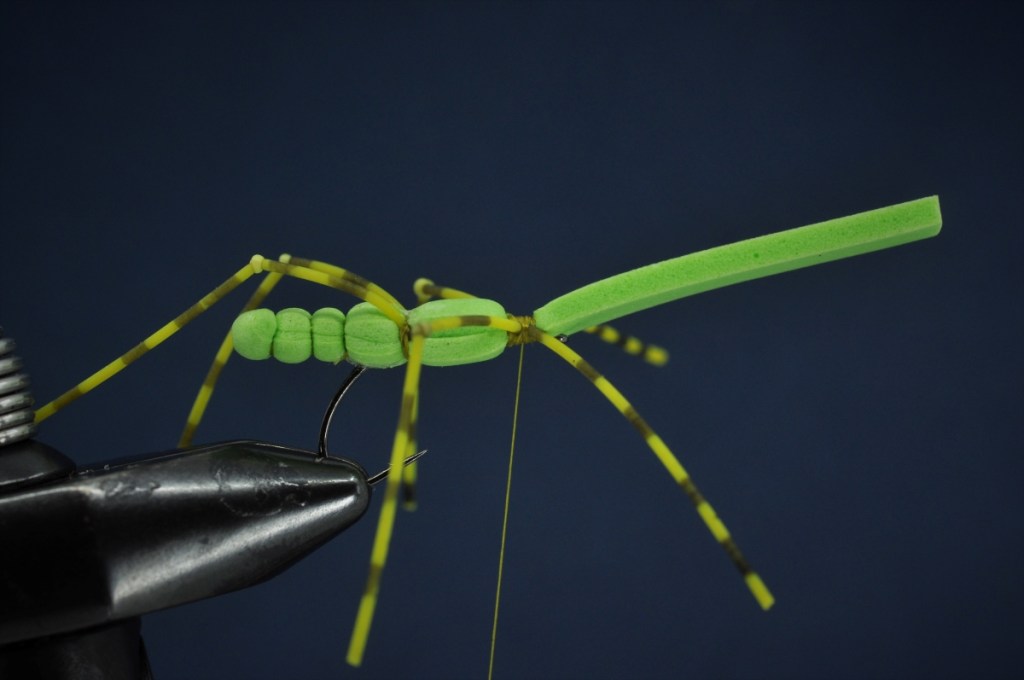
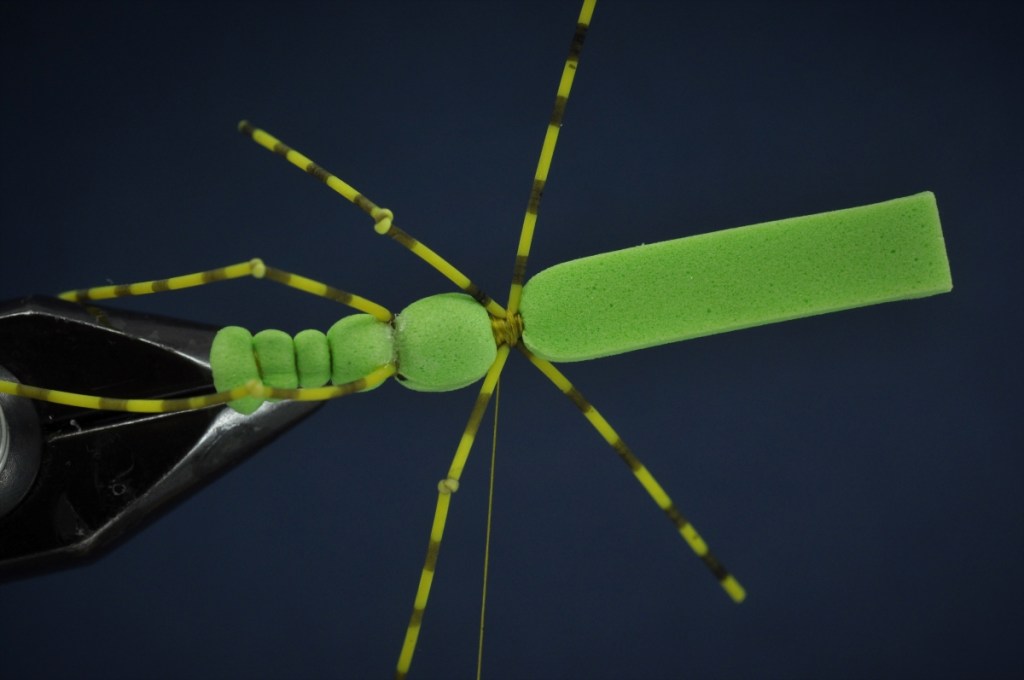
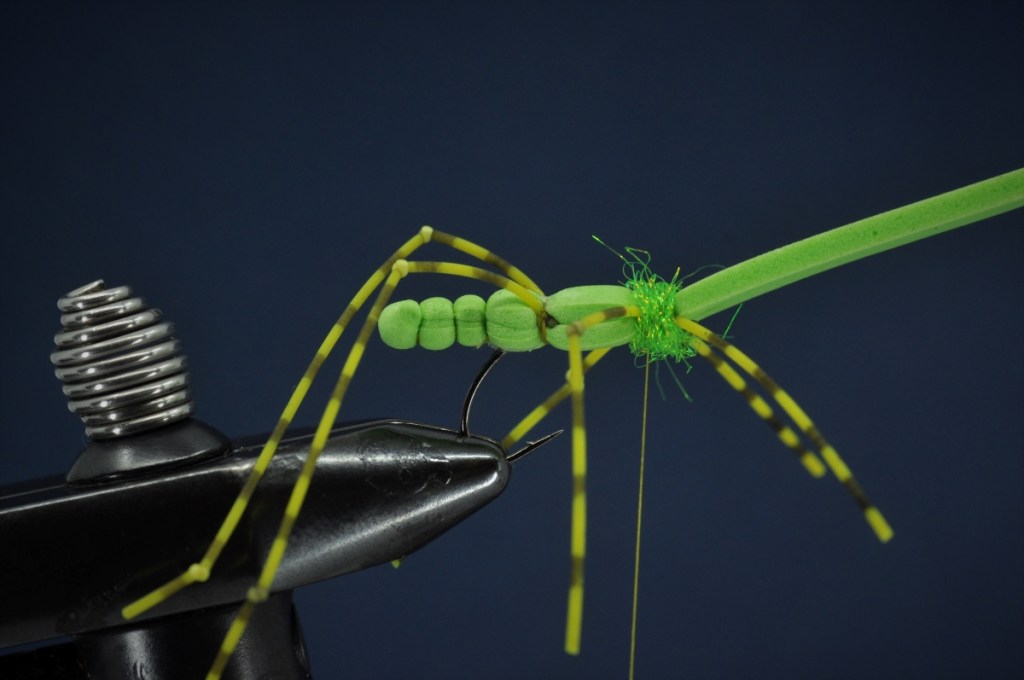
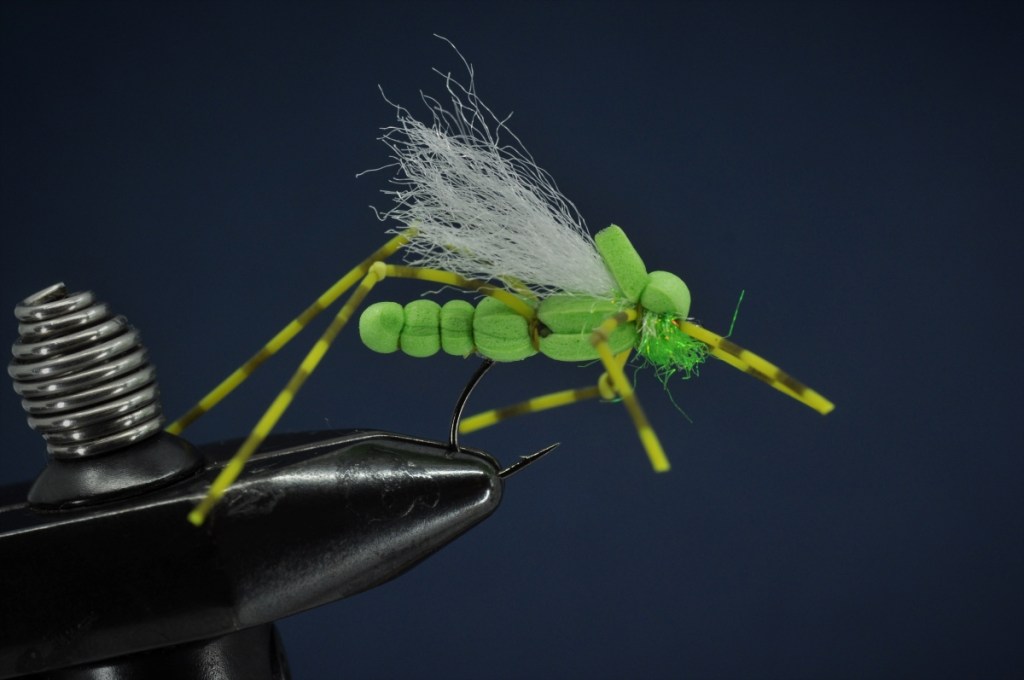
A spin-off of the Extended-body stonefly pattern posted earlier this spring, this pattern was pieced together with the intent of applying that same extended-body technique to flies suitable for south and central Louisiana (where stoneflies are not on the menu). Highly buoyant, this fly should be great for moving water; creating an extremely buggy profile with plenty of movement imparted by the rubber legs.
| Materials: | ||
|---|---|---|
 Klinkhammer (#10-12) Klinkhammer (#10-12) |  8/0 or 70-Denier (Olive or Tan) 8/0 or 70-Denier (Olive or Tan) |  2-mm Foam (Green or Tan) 2-mm Foam (Green or Tan) |
 2-mm Foam (Green or Tan) 2-mm Foam (Green or Tan) |  Round Rubber Legs (Barred Yellow) Round Rubber Legs (Barred Yellow) |  Ice Dub (Green or Tan) under 2-mm Foam Ice Dub (Green or Tan) under 2-mm Foam |
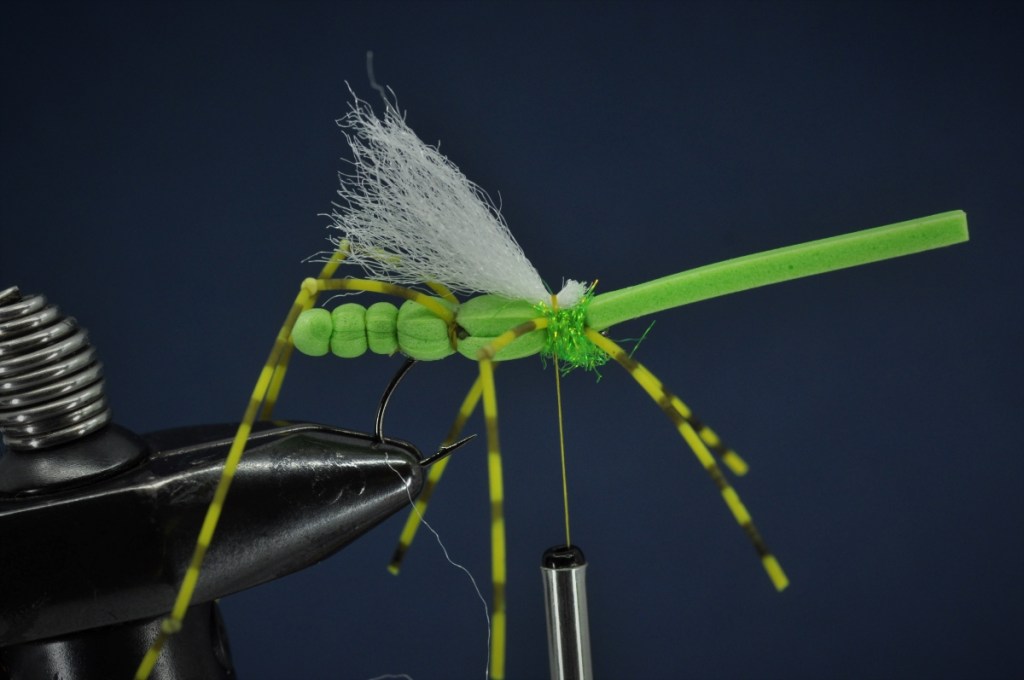
 Synthetic Fibers (White) Synthetic Fibers (White) |  Sewing Needle Sewing Needle |  Superglue Superglue |
Disclosure: This post contains affiliate links. A small commission may be paid for purchases made through these links.
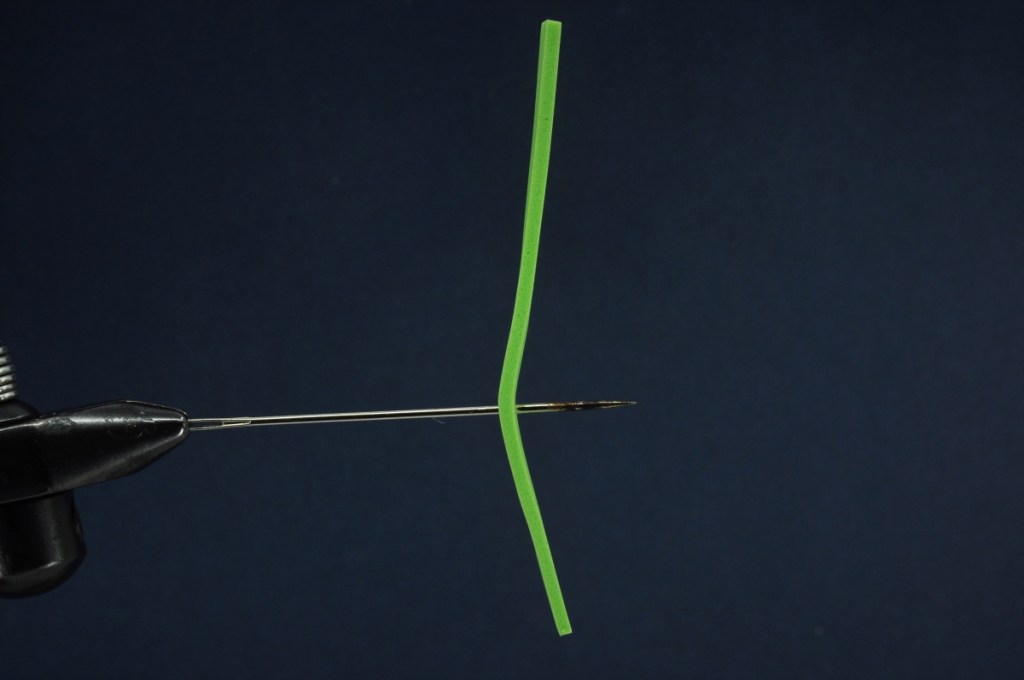
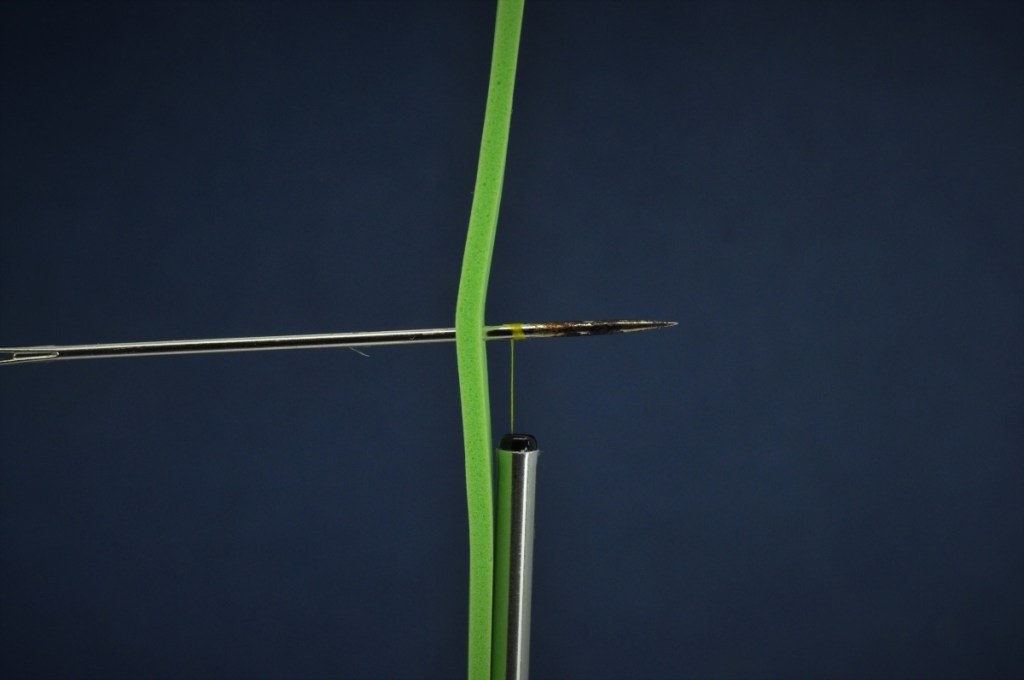
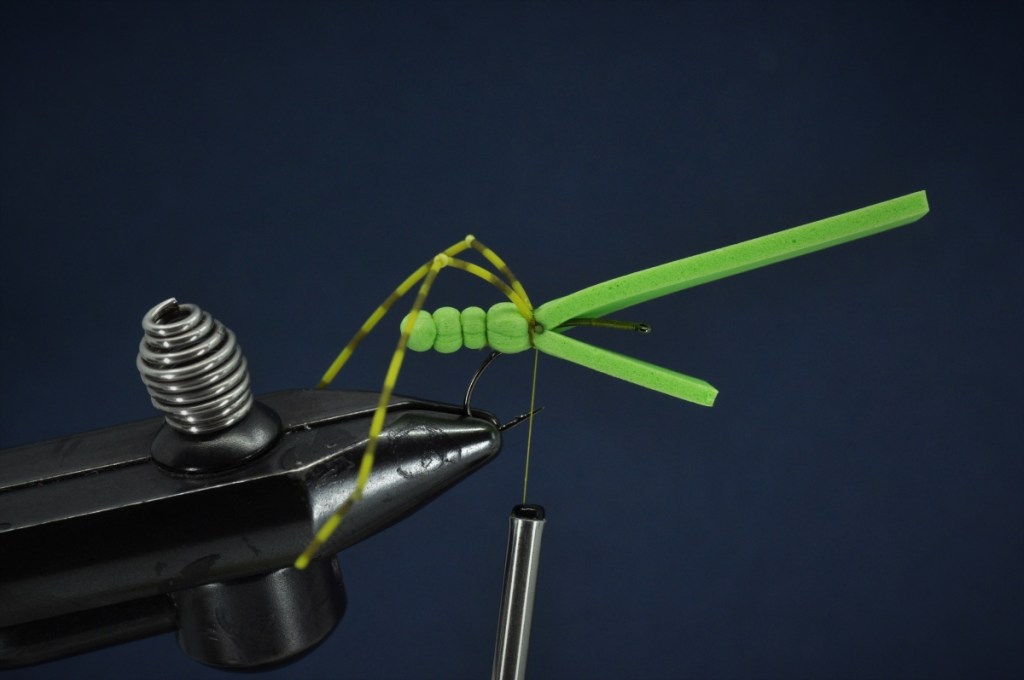
Extended Body Grasshopper Step-by-Step Tying Instructions:
(Mobile Viewers: Click images to enlarge or rotate phone to landscape)


Extended Body Grasshopper Video Tutorial courtesy of Bill Morrison (KFF Fly Tying – July 2023)
Tips and Tricks
- Color Selection – While shades of green, tan, yellow and brown are the most logical options when tying a hopper, don’t overlook black for lower-light situations or brighter “attractor” colors as well. In the case of the former, it will provide an excellent silhouette as the evening light fades. In the case of the latter, it may simply be enough to draw the fish’s attention when nothing else works. Our local spotted bass and sunfish aren’t all that discerning after all. If natural colors aren’t working throw something bright and unnatural to get their attention.
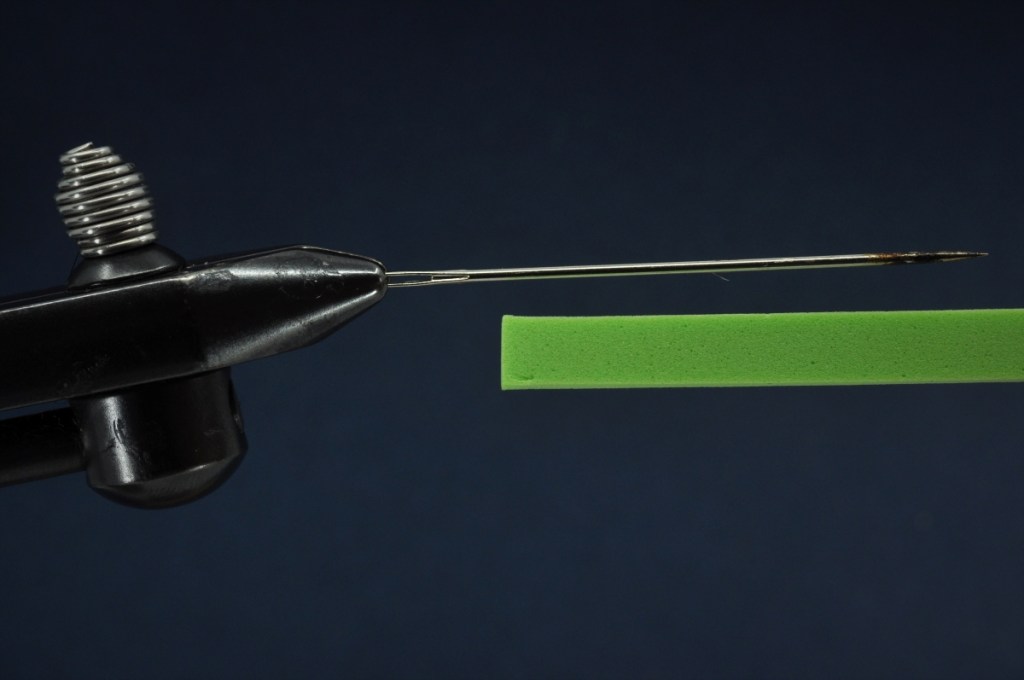
- Needle Gauge – This may be obvious, but if you’re struggling to remove your extended-body from the needle consider a smaller gauge. The sewing needle utilized above is simply what I had available, but a thinner diameter needle would have definitely eased the process of removing the body. This will be particularly important is utilizing this technique for longer/more segmented extended-bodies (i.e. dragonfly/damselfly).
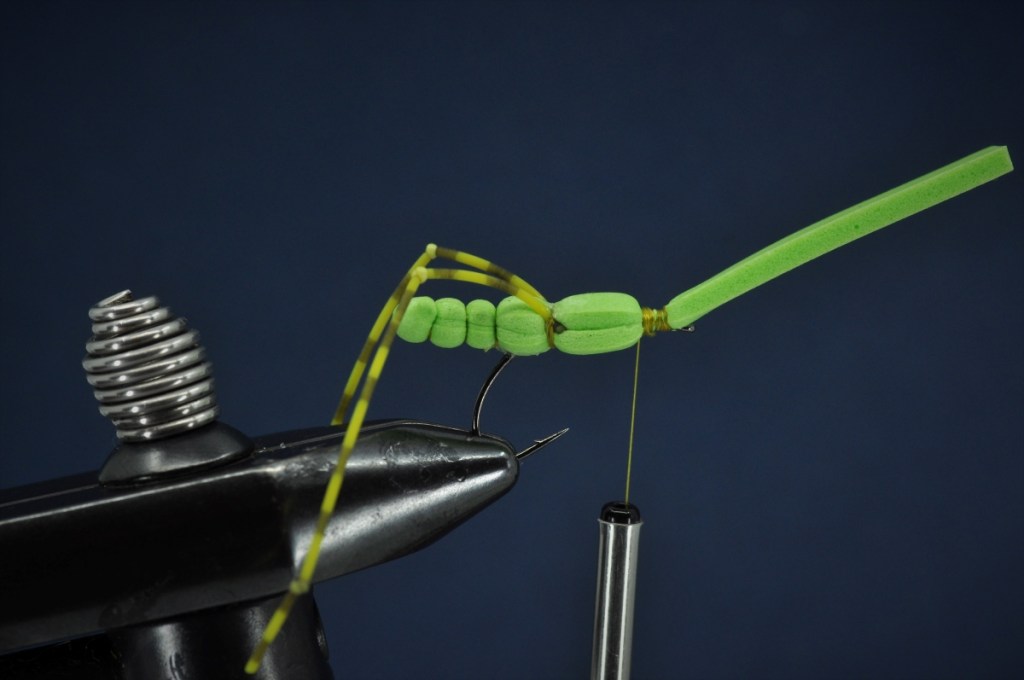
- Spinning Foam – Foam spinning around the shank of the hook can be one of the biggest frustrations when dealing with terrestrials. Above, I addressed this by securing my thorax with a drop of superglue. As an alternative, consider building up a thicker underbody before applying the foam. This could be a thicker thread base, a layer of dubbing applied to the shank, or even a small bit of foam secured to the shank prior to tying in the extended body foam. The additional friction created by this thicker underbody should help limit some of the unwanted spinning as you secure your fly.
- Other Applications –As referenced in the introduction, this pattern was pieced together to provide an example of the extended-body technique. Beyond the hopper above, and the original stonefly pattern it was based on, this technique can also be utilized in a number of other ways. Personally, I’ve used it to create long/thin dragonfly and damselfly abdomens and even experimented with it as means of creating fiddler crab claws. It works great for both. Though, be warned, that foam claw is capable of lifting your crab pattern clean off the bottom. Be sure to use heavy enough dumbbell eyes to compensate.
Proof of Concept
Admittedly, I’ve yet to put this fly to work on the water. My casting elbow has been having issues as of late, and, between that and the triple-digit temps, it simply hasn’t happened. At least a dozen members of the Kisatchie Fly Fishers are now armed with this pattern, however, and I’m hopeful we’ll have some great proof of concept examples rolling in as soon they have a chance to hit the water.
With that in mind, be sure to check back and see how this fly has performed. And, if you have any pics or reports to share, shoot me an email or leave a comment below. I’ll be happy to update this section with everyone’s results.
Tight Line!
Chris
Species Caught on the Extended Body Grasshopper to Date:
Enjoy our Content?
Subscribe below to be notified anytime a new Step-by-Step is added.
Support our Content
Enjoy our content & want to help support our work? Consider clicking one of the Ads below the article if something catches your attention. Each click brings in a small bit of revenue to help offset the cost of maintaining & hosting this great site!
Nice hopper!
Thanks Chuck!