
Looking for something else?
Try one of these!
Herl Nymph Fly Step-by-Step:
There’s something to be said for quick and easy ties. Often a far cry from the elaborate and intricately designed flies that make tying more art than sport, these patterns remain mainstays in our boxes. And, the reason for that is simple…not only are they quick and easy ties, but they catch fish.
Often referred to as “Guide Flies,” these patterns often require only a handful of materials and can be tied in a matter of minutes. They are more imitative than realistic and rely heavily on the general buggy nature of the tying materials to elicit strikes.
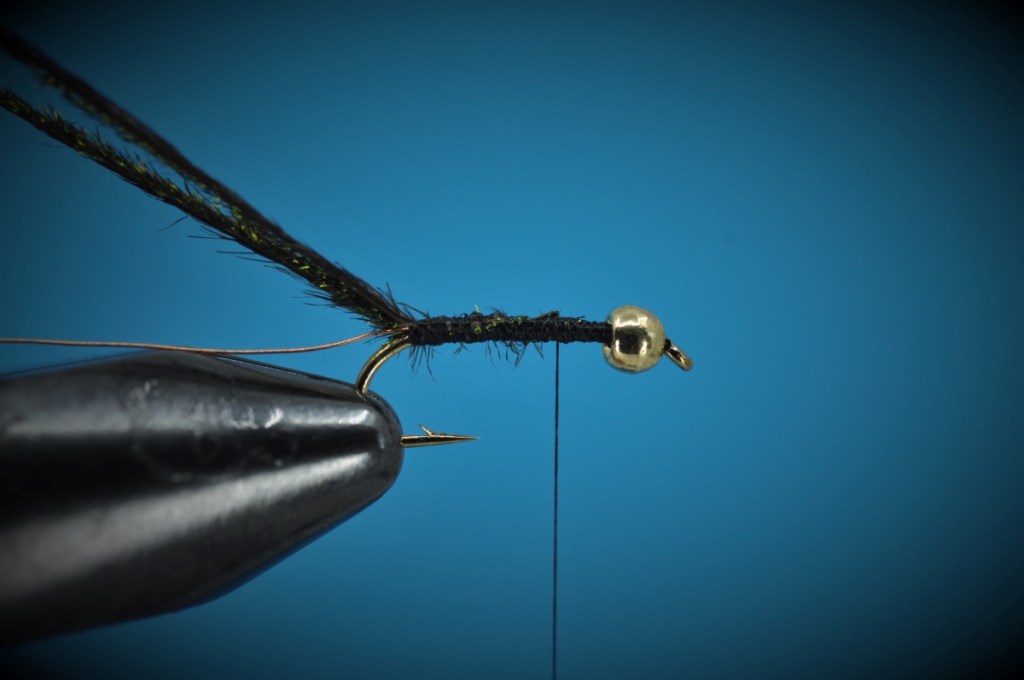
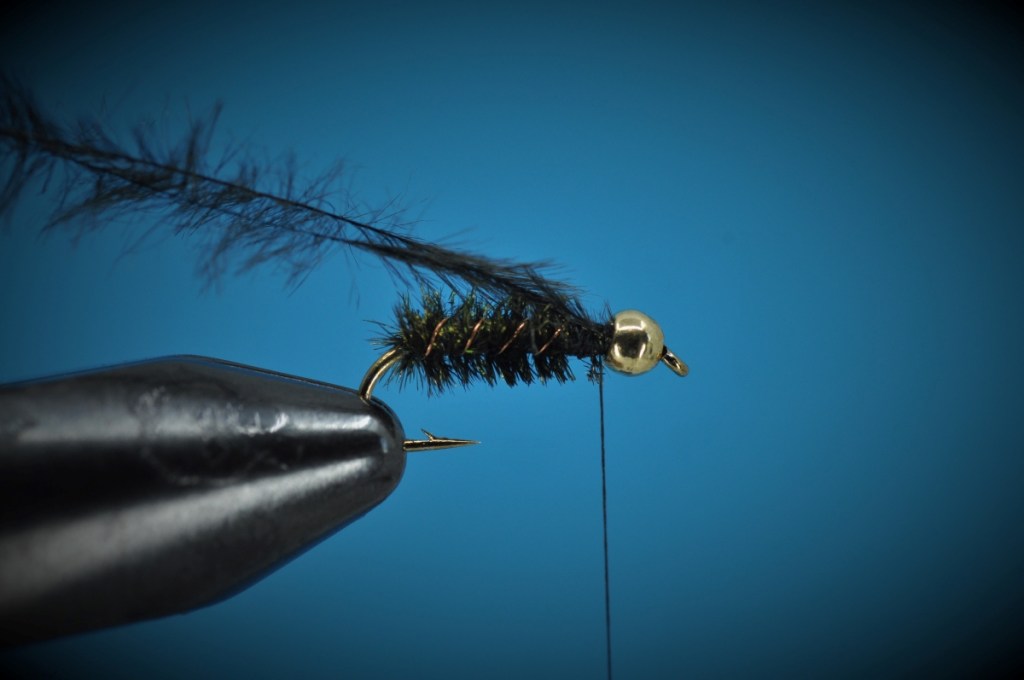
In the world of nymphs, there may be no better example of such patterns than the Herl Nymphs. A general classification that includes such classics as the Pheasant Tail, such nymphs are known fish catchers as trout simply can’t resist the profile and flash of these simple creations. For today’s Step-by-Step, we’ll be highlighting a simple derivation of this theme intended to mimic a caddis. Consisting of little more than Peacock and Ostrich Herl, this fly can be tied in a matter of minutes…making restocking your nymph box a quick and easy task.
| Materials: | ||
|---|---|---|
 2x-Long Nymph (#10-16) 2x-Long Nymph (#10-16) |  8/0 or 70-Denier (Black) 8/0 or 70-Denier (Black) |  Tungsten Bead (4mm; Gold) Tungsten Bead (4mm; Gold) |
 Peacock Herl Peacock Herl |  Ostrich Herl (Black) Ostrich Herl (Black) |  Lead-free Wire (0.015) Lead-free Wire (0.015) |
Disclosure: This post contains affiliate links. A small commission may be paid for purchases made through these links.
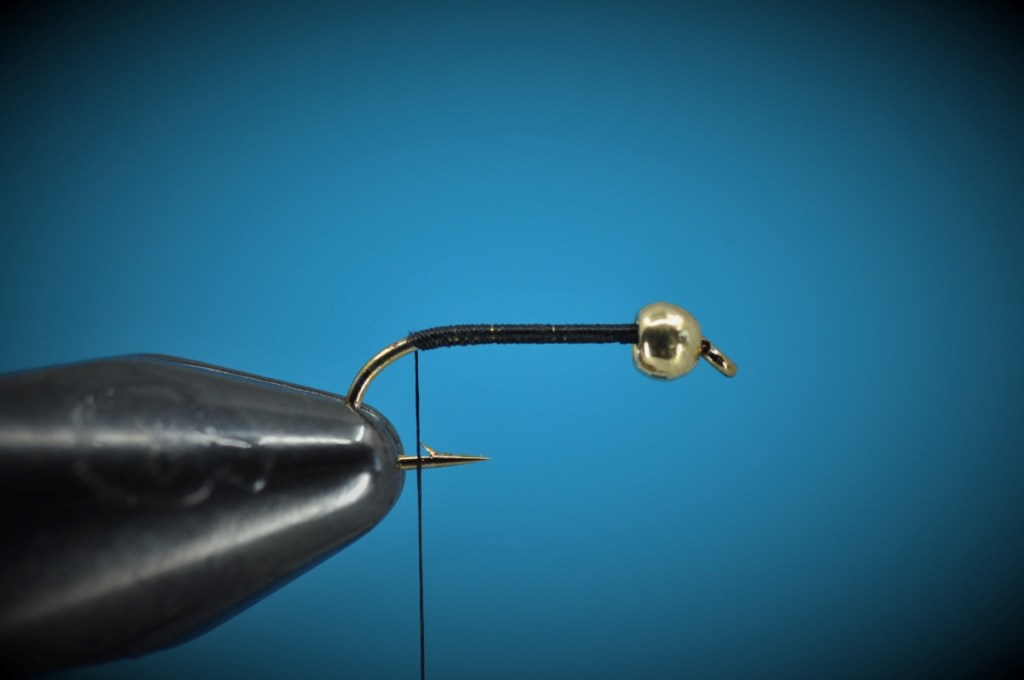
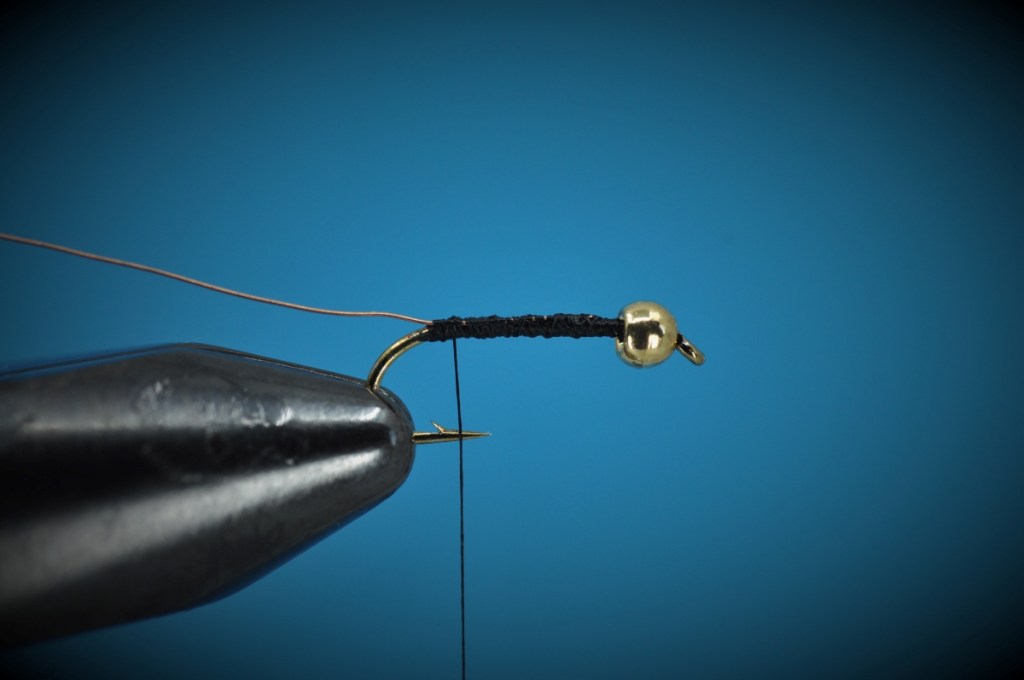
Herl Nymph Fly Step-by-Step Tying Instructions:
(Mobile Viewers: Click images to enlarge or rotate phone to landscape)


Tips and Tricks
- Stillwater Special – I admittedly do not have much in the ways of Tips & Tricks with regard to this simple pattern. However, it is worth noting that in his book, Essential Trout Flies, Dave Hughes advocates for the use of this pattern in stillwater settings. In his experience, the pattern is especially effective around plant beds where trout are feeding on cased caddis larvae.
- Going Deep – Need to get this pattern a little deeper. Consider adding a few wraps of Lead-free Wire before building a thread base.
Proof of Concept
With the heat dome still in place over the southern US, it may be a while before I have the opportunity to test the Herl Nymph out. That said, I’m not beyond succumbing to the random urge to hop a flight to Colorado for the weekend. With that in mind, stay tuned…
Tight Line!
Chris
Species Caught on the Herl Nymph to Date:
Enjoy our Content?
Subscribe below to be notified anytime a new Step-by-Step is added.
Support our Content
Enjoy our content & want to help support our work? Consider clicking one of the Ads below the article if something catches your attention. Each click brings in a small bit of revenue to help offset the cost of maintaining & hosting this great site!
I tie a similar fly, using the tips as a tail about 3/4 of a hook length long and then wrap the herl forward. Sometimes I add a grizzly hackle to make it more buggy or add a glass bead to the head to get the fly deeper. Peacock herl is one of my favorite materials and the fish like it too.
Thanks for the tips, Chuck. I’ll have to try adding a tail to a few next time I sit down at the vise. I’ve used hackle fibers (black or grizzly) as legs in the past as well. It certainly makes for a nice buggy profile.