Looking for something else?
Try one of these!
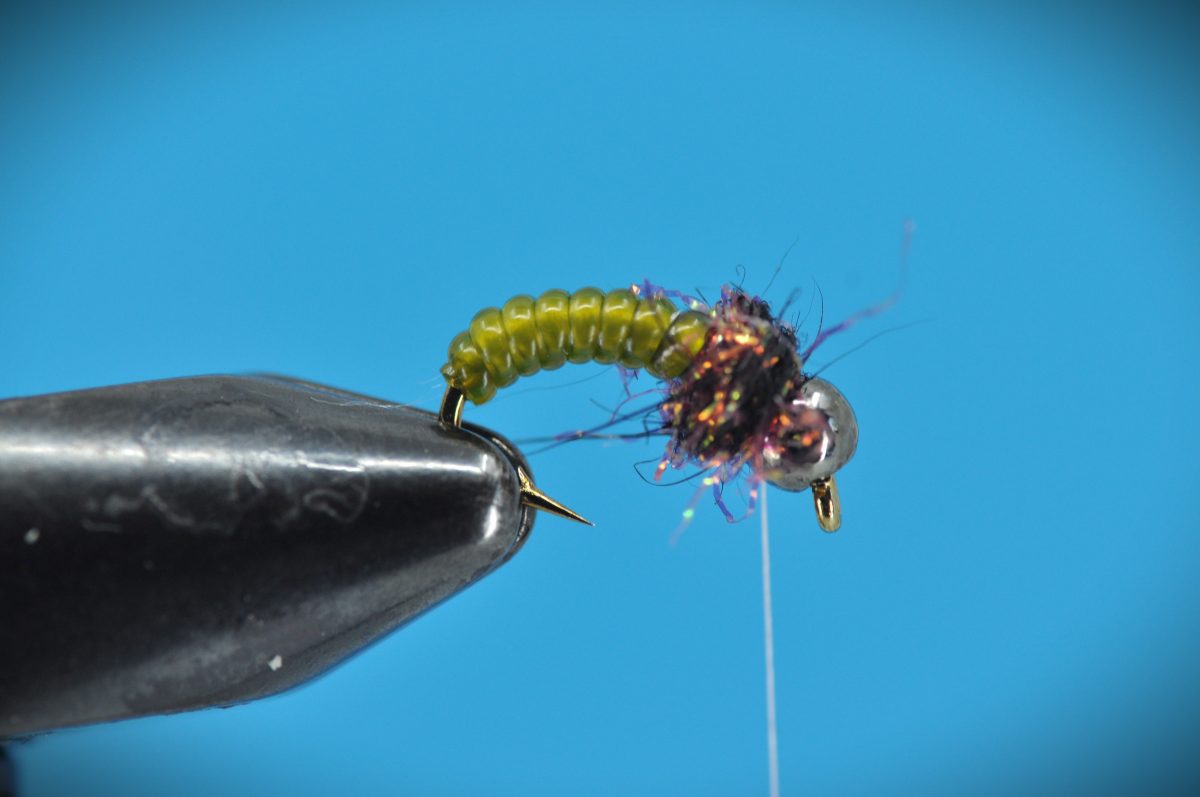
Vinyl Rib Caddis Larva Step-by-Step:
With fall in full swing, it’s time to begin restocking boxes as we daydream about the places we’ll fish next spring and summer. No doubt those of us who live in the south will still find our way to the water in the coming months, but, for those in cooler climes, it’s time to focus on filling those boxes in anticipation of 2024.
In my case, I decided to start with trout boxes in the perhaps naïve hope that I will once again find my way to a coldwater stream sometime in the coming year. That means working my way through the various aquatics so foreign to those of us whose focus remains on warmer waters most of the year. While a wide variety of stoneflies and mayflies will grace these pages in the coming months, today’s focus will be the caddis.
Small and moth-like, these ubiquitous aquatic insects are a mainstay in the trout’s diet, especially in their larval form. With that in mind, I decided it was time to expand my caddis offerings and add the Vinyl Ribbed Caddis to my box.
Tied here on a #12 scud hook, the pattern requires only five materials and can be tied by even the novice tyer in a matter of minutes.
| Materials: | ||
|---|---|---|
 Curved Nymph/Scud (#12-18) Curved Nymph/Scud (#12-18) |  70-Denier (Black/White/Green) 70-Denier (Black/White/Green) |  Tungsten (1/8″; Black) Tungsten (1/8″; Black) |
 Lead-free Wire (optional) Lead-free Wire (optional) |  Vinyl Rib (Med; Green) Vinyl Rib (Med; Green) |  Hare’e Ice Dub (Black) Hare’e Ice Dub (Black) |
Disclosure: This post contains affiliate links. A small commission may be paid for purchases made through these links.
Vinyl Rib Caddis Step-by-Step Tying Instructions:
(Mobile Viewers: Click images to enlarge or rotate phone to landscape)


Tips and Tricks
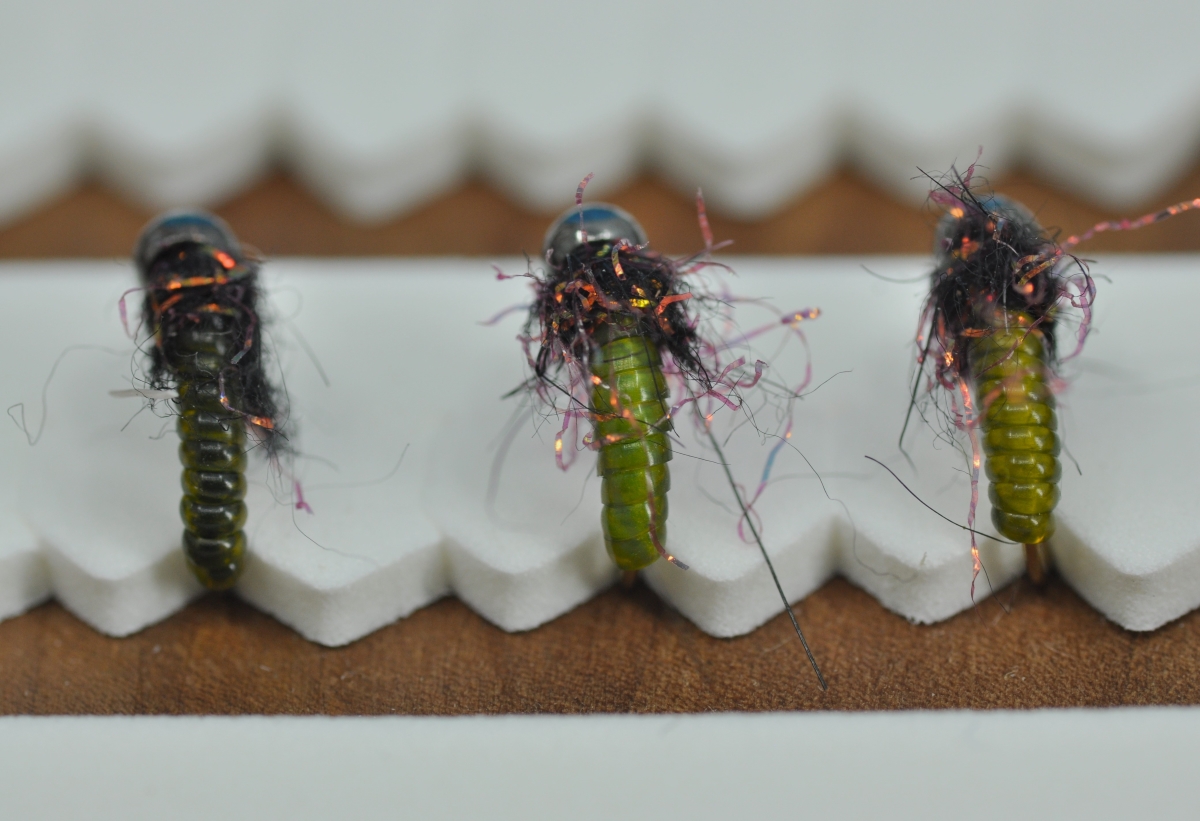
- Thread Color – One thing I really like about this pattern is the fact subtle changes in color can be achieved by simply swapping out your thread color. The vinyl rib utilized for the body is transparent in nature. This allows the color of the underlying thread base to determine the final look of your fly. Want a darker body on your fly? Lay down a base layer of black or brown thread before tying in your vinyl rib. Prefer something lighter? Try white. Or, if you really want the color to pop consider laying down a layer of florescent green or chartreuse below that ribbing. Don’t believe me? Scroll back up and check out the image at the top of this post. All three flies shown are tied with the exact same materials. The only change made was to the thread color utilized.
- Additions – While I achieved the look I wanted by brushing out the dubbing color at the rear of the bead, a wrap of soft hackle may add to the life-like appeal of this pattern. Partridge, Grouse or India Hen are all suitable options. Just be sure to select a feather that is approximately the same length as the ribbed abdomen.
- Going Deep – If you need to get this fly deep, consider adding some wraps of Lead-free wire immediately behind your bead. This should give you the extra weight to get down into those deeper pockets without altering the profile of your fly.
- Substitutions – While there’s not a great deal of room for substations on this pattern, dubbing selection is certainly open to interpretation. I utilized the Hare’e Ice Dub still on my bench from last week’s tutorial. However, a darker SLF Dubbing blend, Black Hare’s Ear dubbing or any synthetic you may have on hand should suffice.
Proof of Concept
The vinyl-rib caddis larva is a new pattern for me, and, as such, remains unproven at this time. Hopefully, I’ll be able to rectify that sometime in the summer of 2024 as I am long overdue for a trip to Colorado. Until then, let me know what your experiences have been with this pattern.
Tight Line!
Chris
Species Caught on the Vinyl Rib Caddis to Date:
Enjoy our Content?
Subscribe below to be notified anytime a new Step-by-Step is added.
Support our Content
Enjoy our content & want to help support our work? Consider clicking one of the Ads below the article if something catches your attention. Each click brings in a small bit of revenue to help offset the cost of maintaining & hosting this great site!
In your picture of three finished flies at the end, I really like the body colors of the center and right-hand ones. I tied all three a few years ago as you did here; after losing all of the two I prefer without a hit, I tied on the one I considered a fail since it was almost black (similar to the one on the left in your photo). WHAM! I now only tie these in olive D-rib (not light olive) over olive or black thread.
Earlier this fall, a friend of mine tried the same dark version when we were having a slow day; he quickly hooked and lost one, then netted a 21″ rainbow. I’m sold.
Great tip! Thanks for sharing! I’ll keep this in mind as I build out this year’s trout box.