Looking for something else?
Try one of these!
Modified Carp Bug Step-by-Step:
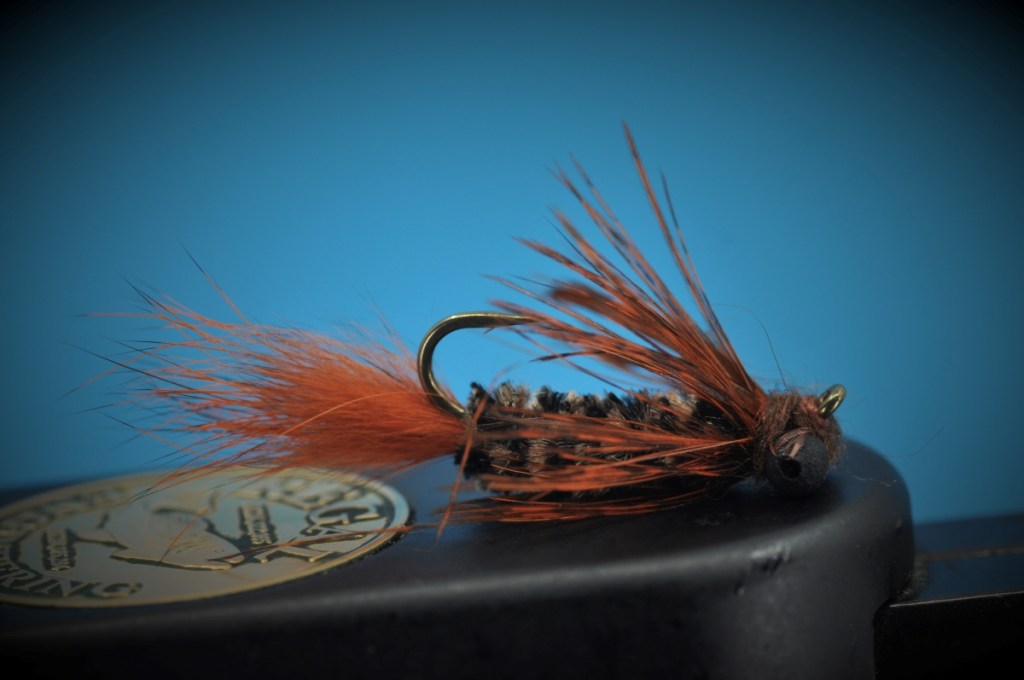
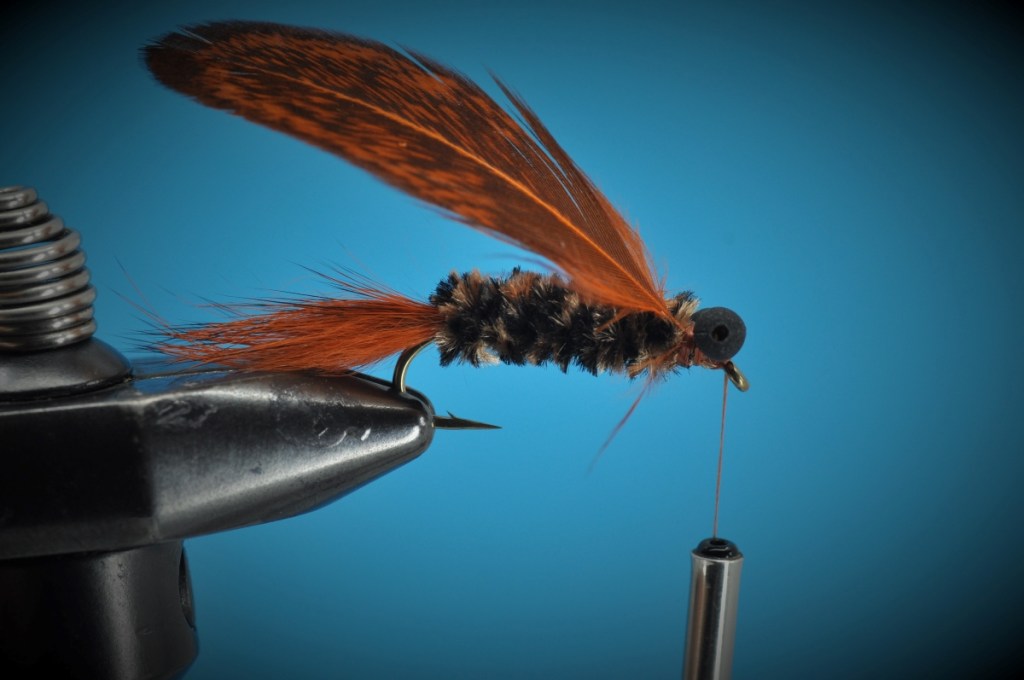
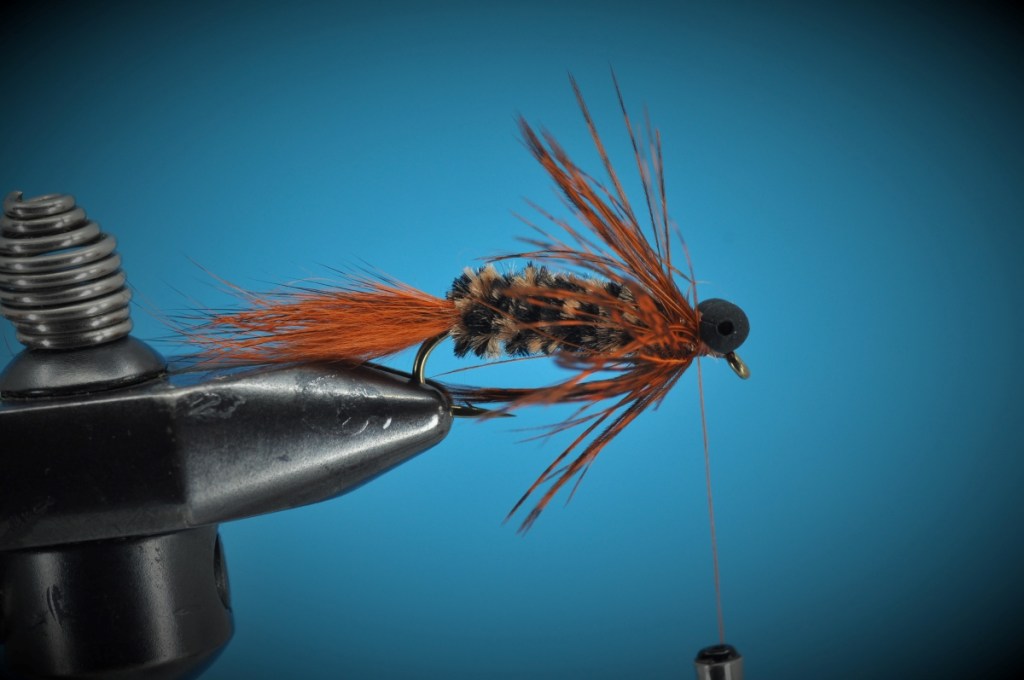
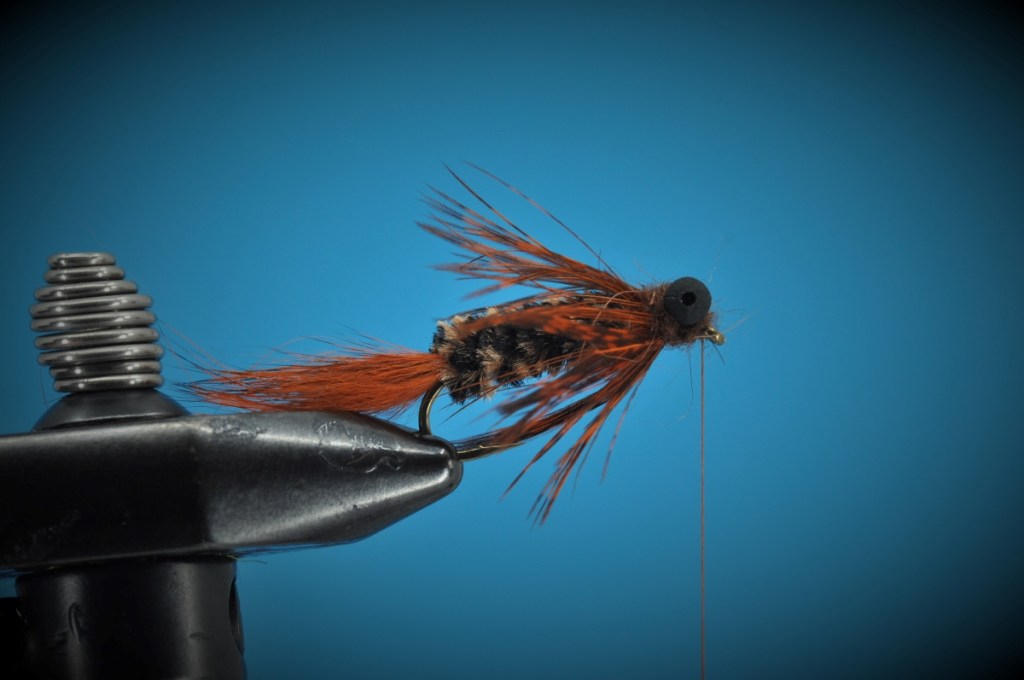
Among the flies featured in Jay Zimmerman’s The Best Carp Flies is a nymph pattern from Andrew Spinato simply called the Carp Bug. The first “western” carp pattern Zimmerman was introduced to, the pattern is reminiscent of a Clouser’s swimming nymph; riding hook point down with rabbit fur tail and hen hackle collar. No doubt effective given its similarities with the swimming nymph, I still initially skipped over this pattern as I stocked my carp box with Zimmerman’s recommendations. Simply put, the Carp Bug seemed a little redundant in a box already stocked with olive and crawfish colored swimming nymphs.
Recently, however, as I reviewed Zimmerman’s work once again, I came across his notes on Pattern Variations for the Carp Bug. In it, he proposed a modified version of the fly with hook point riding up. The result, a swimming pattern now converted to drag-and-drop. This, in contrast to the original, could potentially fill a void in my current carp selection.


Disclosure: This post contains affiliate links. A small commission may be paid for purchases made through these links.
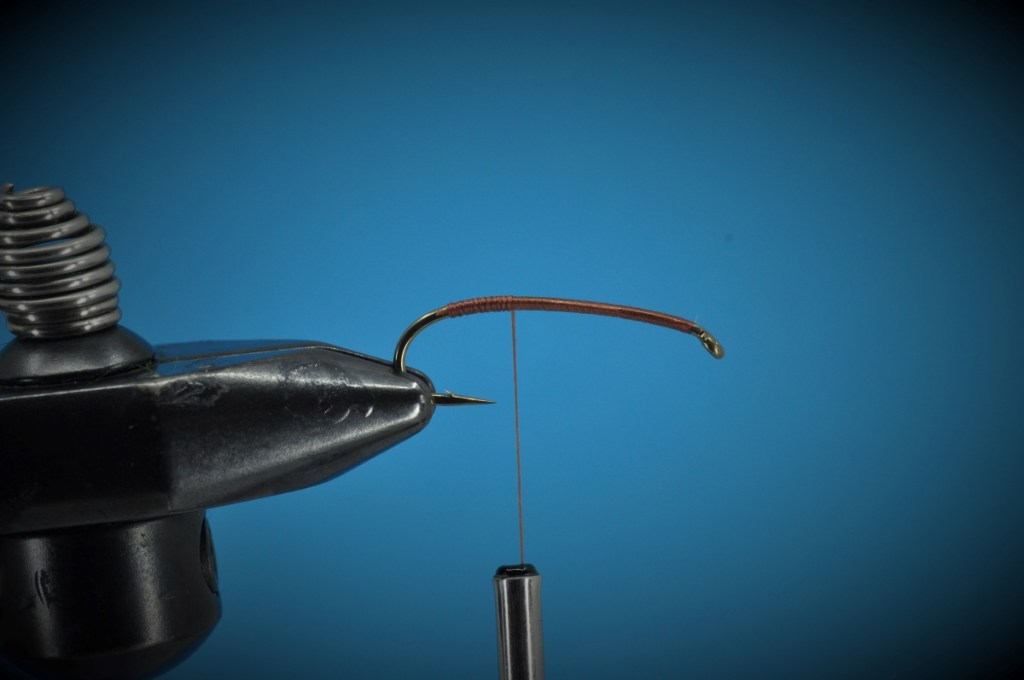
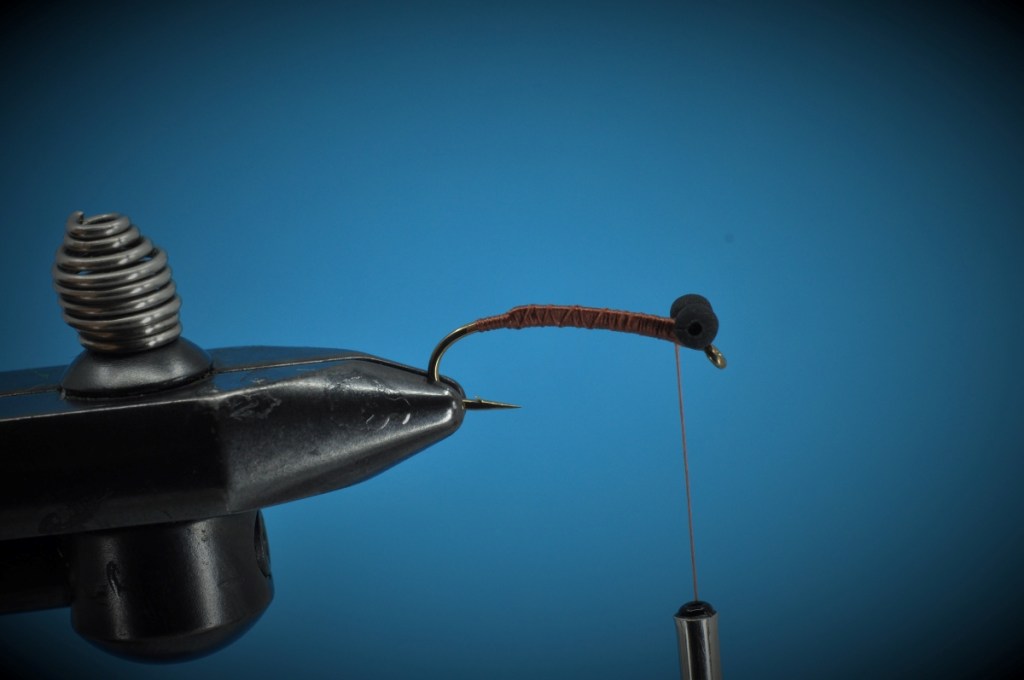
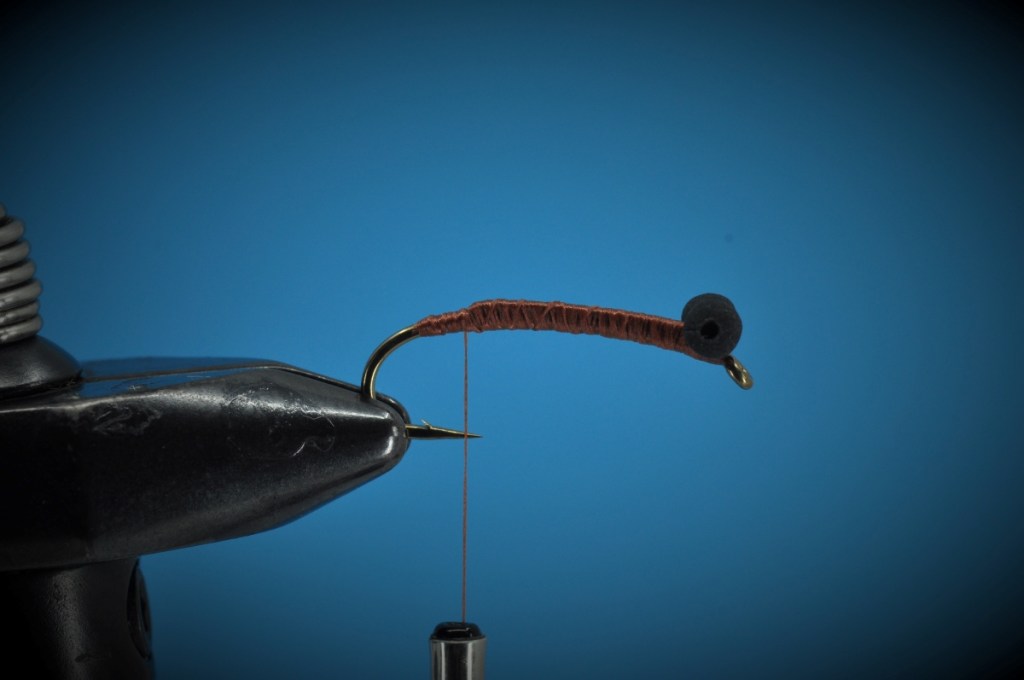
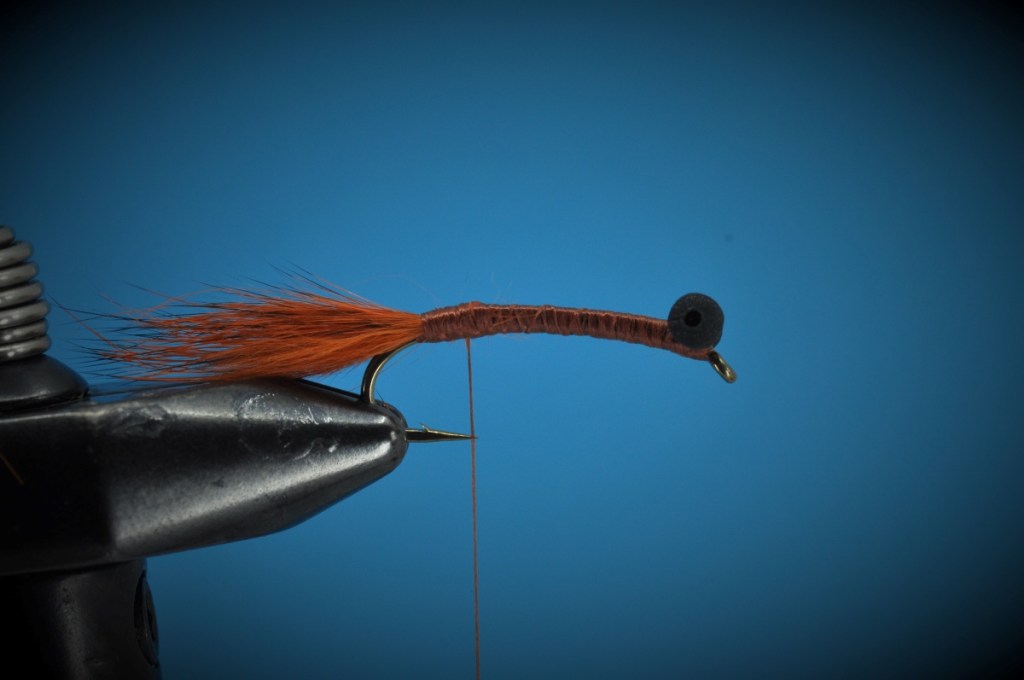
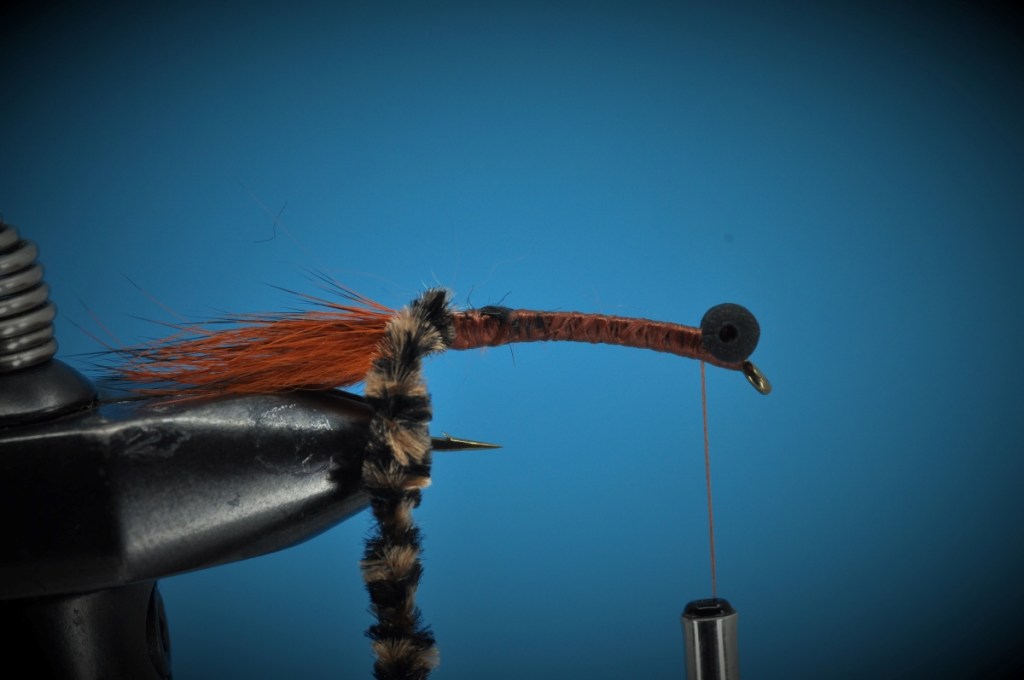
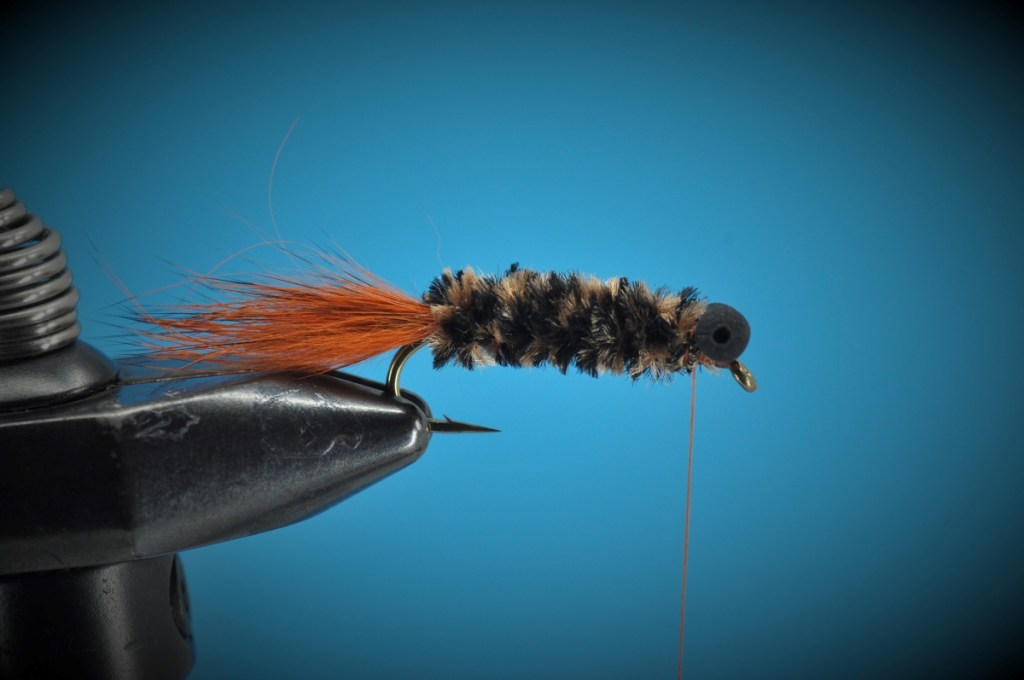
Modified Carp Bug Step-by-Step Tying Instructions:
(Mobile Viewers: Click images to enlarge or rotate phone to landscape)

Tips and Tricks
- Color Selection – As with most carp flies, this pattern can be attempted in a range of “carpy” colors. I selected rust as it most closely matched the variegated chenille I had on hand. However, any combo of olive, tan, brown or black may be called for depending on your local waters.
- “Lift Kits” – Getting light flies to ride hook point up can be a challenge. Bead chain eyes aren’t always enough to balance the weight of the hook, resulting in a fly that swims unnaturally and is prone to snagging. Heavier dumbbell eyes potentially resolve this issue, but the resulting weight change can significantly affect sink rates and the fly’s motion. Instead, Zimmerman recommends installing “lift kits;” the practice of distancing your bead chain from the shank of the hook as demonstrated in steps 2 & 3 above. The resulting change in center of gravity should be enough to ensure your fly rides hook point up. Just secure some lead-free wire or heavy mono to the top of your shank before adding bead chain, and you’re good to go.
- Adhesives and Carp Flies – Admittedly, this is a copy and paste from last week, but it bears repeating. At least among fish, carp have a renowned sense of smell. While that doesn’t stop everyone from using super glue, flex seal or Zap-a-Gap in their fly design, it is enough to give me pause. Personally, I’d rather catch a few fish before my fly falls apart as opposed to not catching any fish due to the smell of my fly. This isn’t to say you can’t use these adhesives and fixing agents on your fly, just keep in mind that they may be the problem if carp keep refusing your offerings.
Proof of Concept
While I haven’t had an opportunity to test this fly out just yet, I hope to spend a few hours on the New Orleans canals this Sunday in search of carp. Be sure to check back next week if you’re curious to see how I did.
Tight Line!
Chris
Species Caught on the Modified Carp Bug to Date:
Enjoy our Content?
Subscribe below to be notified anytime a new Step-by-Step is added.
Support our Content
Enjoy our content & want to help support our work? Consider clicking one of the Ads below the article if something catches your attention. Each click brings in a small bit of revenue to help offset the cost of maintaining & hosting this great site!